Automatically Generate Blog Comments via Chrome Extension for Efficient Backlinking
Automatically Generate Blog Comments via Chrome Extension for Efficient Backlinking
While posting backlinks on various sites recently, I focused heavily on blogs and forums. The process turned out to be quite tedious and time-consuming:
First, I had to manually copy the blog content into ChatGPT → then provide a prompt for generating a comment → then copy and paste the comment back into the blog’s comment section. The whole experience was fragmented and inefficient.
Sometimes, I also needed to embed my website link within the comment. This meant tweaking the prompt again—and again—until I got a satisfactory result. All of this drastically reduced my backlinking efficiency.
That got me thinking: what if we could develop a plugin to automate this process? Using AI to generate natural, on-topic, and interactive comments would not only improve efficiency but also increase the chances of getting approved by moderators.
I also noticed that many people in our community had similar needs. So I took action and, after about a week of development, created AutoCommentAI—and now I want to share it with anyone who might find it useful.
The Problem with Blog Comment Backlinking
Here’s a breakdown of the main time-consuming steps in the blog/forum comment backlink process:
-
Switching between the blog/forum page and ChatGPT.
First, you need to copy the content of the blog/forum post into ChatGPT. Then, after generating the comment, copy it back into the blog’s comment section. This back-and-forth is fragmented and messy—especially with multiple tabs open. -
Repeating the same prompts.
Every time you want to generate a comment, you have to write similar prompts (to explain the task, tone, length, style, and interactivity). Though short, doing this repeatedly becomes annoying. Plus, prompts often need fine-tuning if the generated comments don’t meet expectations. -
Embedding links is troublesome.
Sometimes, you want to embed a link naturally within a comment—without making it look like a blatant ad. This requires careful prompt adjustments. And if you don’t need a link, you have to tweak the prompt again. Different blogs and forums also have different requirements for how links should be formatted—so you end up tweaking the prompt several times. -
Low efficiency when promoting multiple websites.
Many of us operate more than one website. Ideally, we’d like to promote multiple sites simultaneously. But in reality, the workload and time required increase linearly. You have to copy content multiple times, write prompts multiple times, and add different links each time. It’s just not scalable.
Because of these pain points, AutoCommentAI was designed with workflow simplification and automation in mind—to eliminate as many repetitive tasks as possible and save your time.
Key Features of AutoCommentAI
AutoCommentAI mainly solves the above problems with the following features:
-
🔍 Smart Content Extraction
Automatically identifies and extracts the core content of a blog or forum post, filtering out ads, pop-ups, and clutter so that comments always stay on topic. -
🤖 Natural, Relevant, Interactive Comment Generation
With one click, generate comments that sound natural, are content-relevant, and include interactive elements. Easily configure tone, persona, and style. -
🔗 Seamless Link Embedding in Comments
Naturally and non-intrusively embed promotional or reference links within comments to enhance marketing effectiveness. -
📦 Batch Comment Generation
Generate multiple personalized comments at once—each can contain a different link. Perfect for link-building and content marketing. -
⚡ Auto-Fill Comment Forms
Automatically detects comment form fields (like title, email, URL, comment body) and fills them in—no more copy-pasting. -
🔐 Privacy-First, Local Storage
All data (links, preferences, settings) are stored in your browser locally. No personal data is collected, so it’s safe to use.
How to Use the Plugin
Using AutoCommentAI is simple:
1. Install the Plugin
2. Sidebar Interface
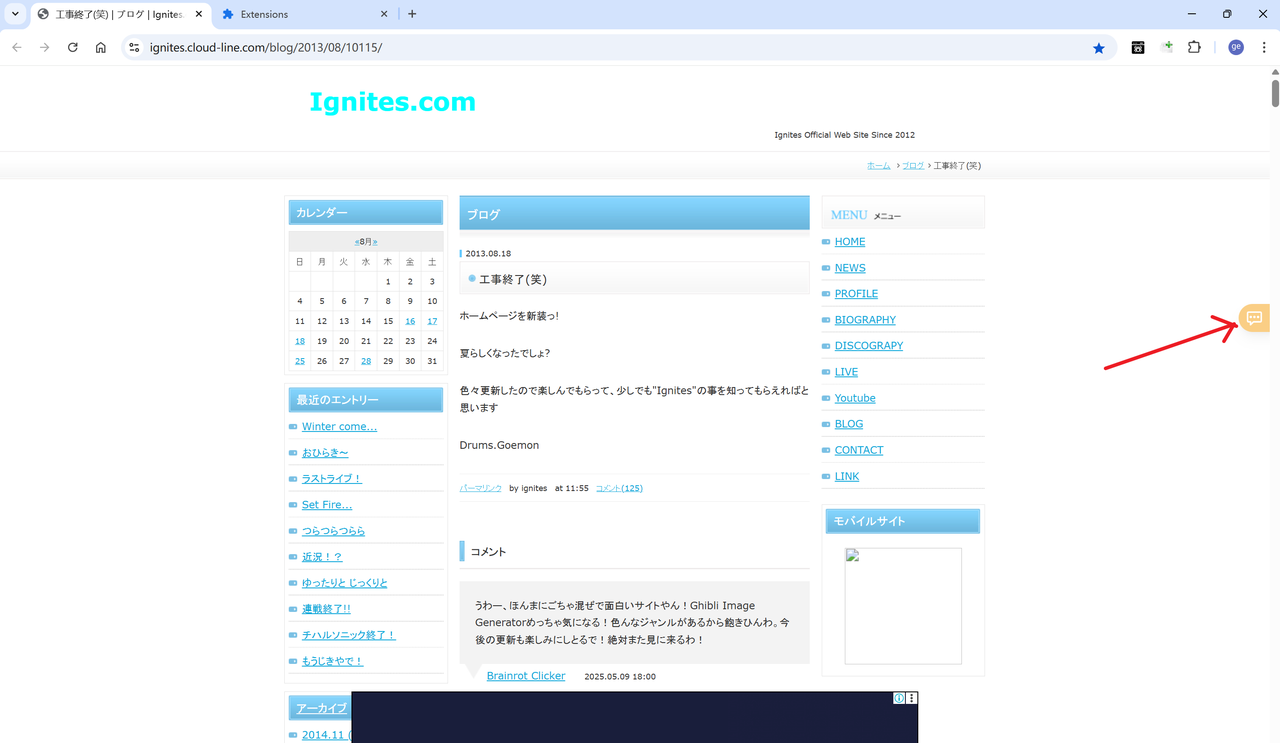
AutoCommentAI uses a sidebar as its main interface.
Once installed, open any page—you’ll see a small yellow icon on the right. Click it to open the panel (you must log in first).
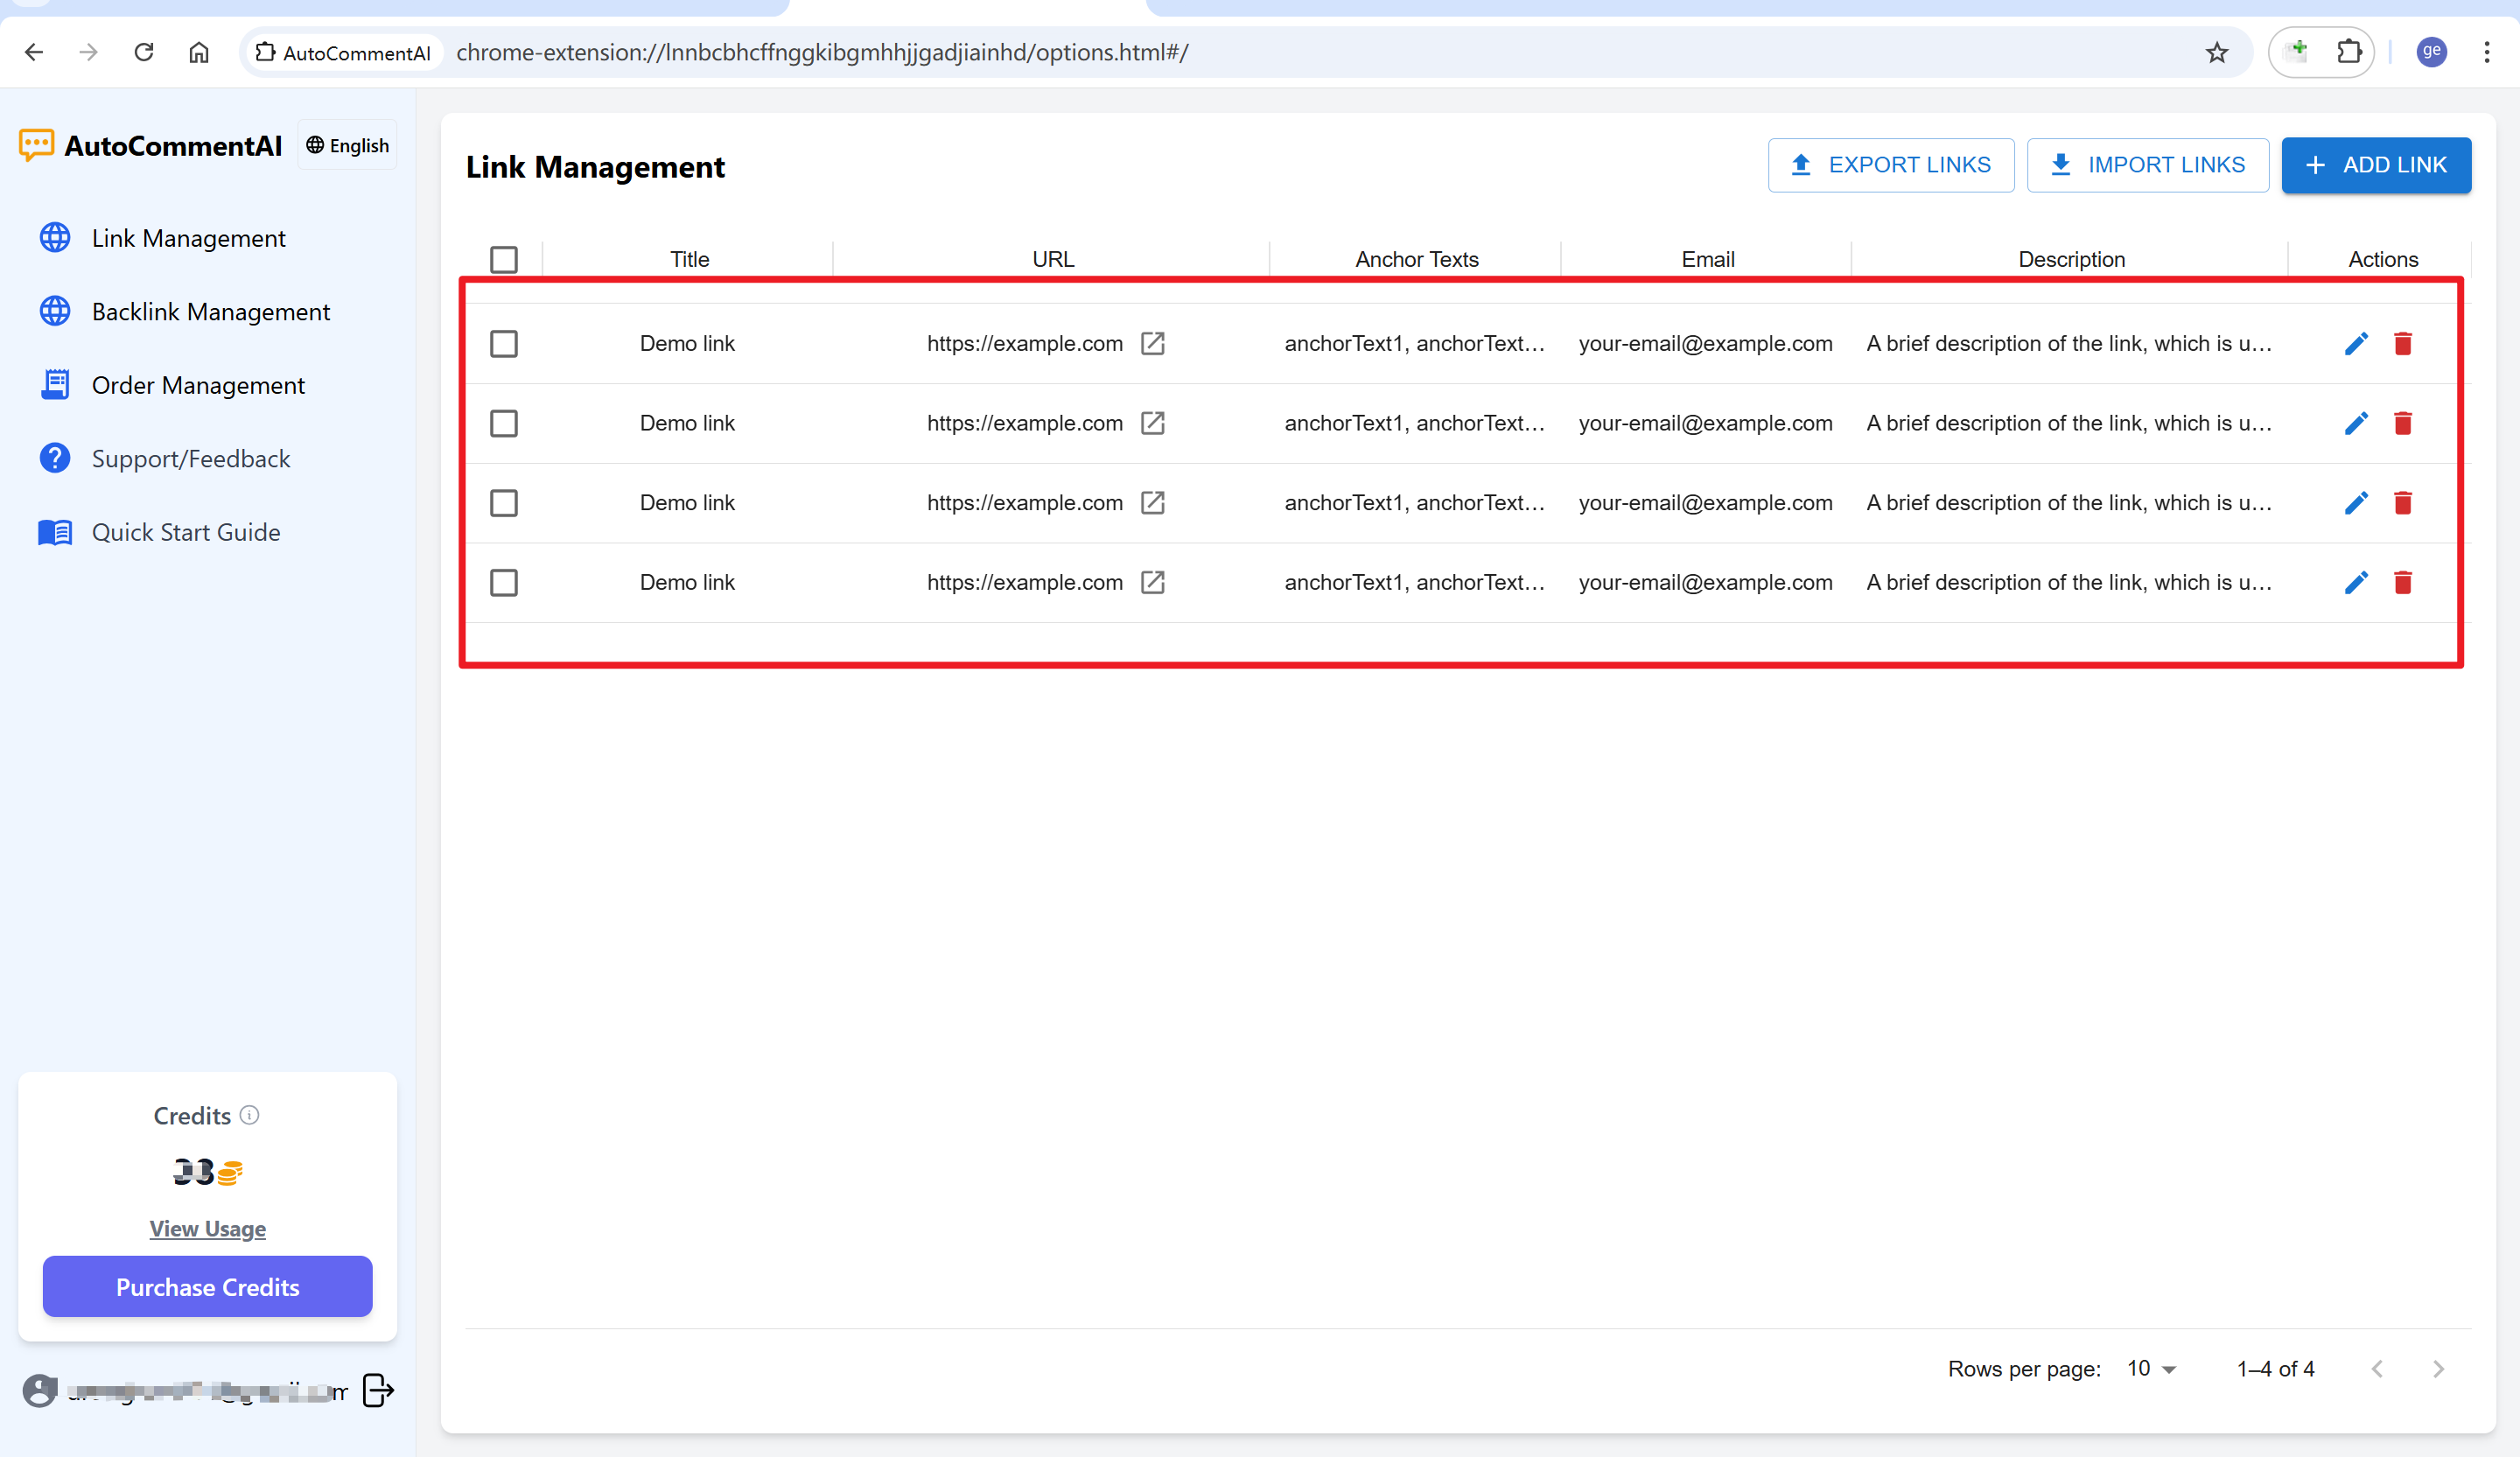
3. Add Website Link Info
The plugin includes a backend panel where you can add the websites you want to promote. This data is stored locally in your browser.
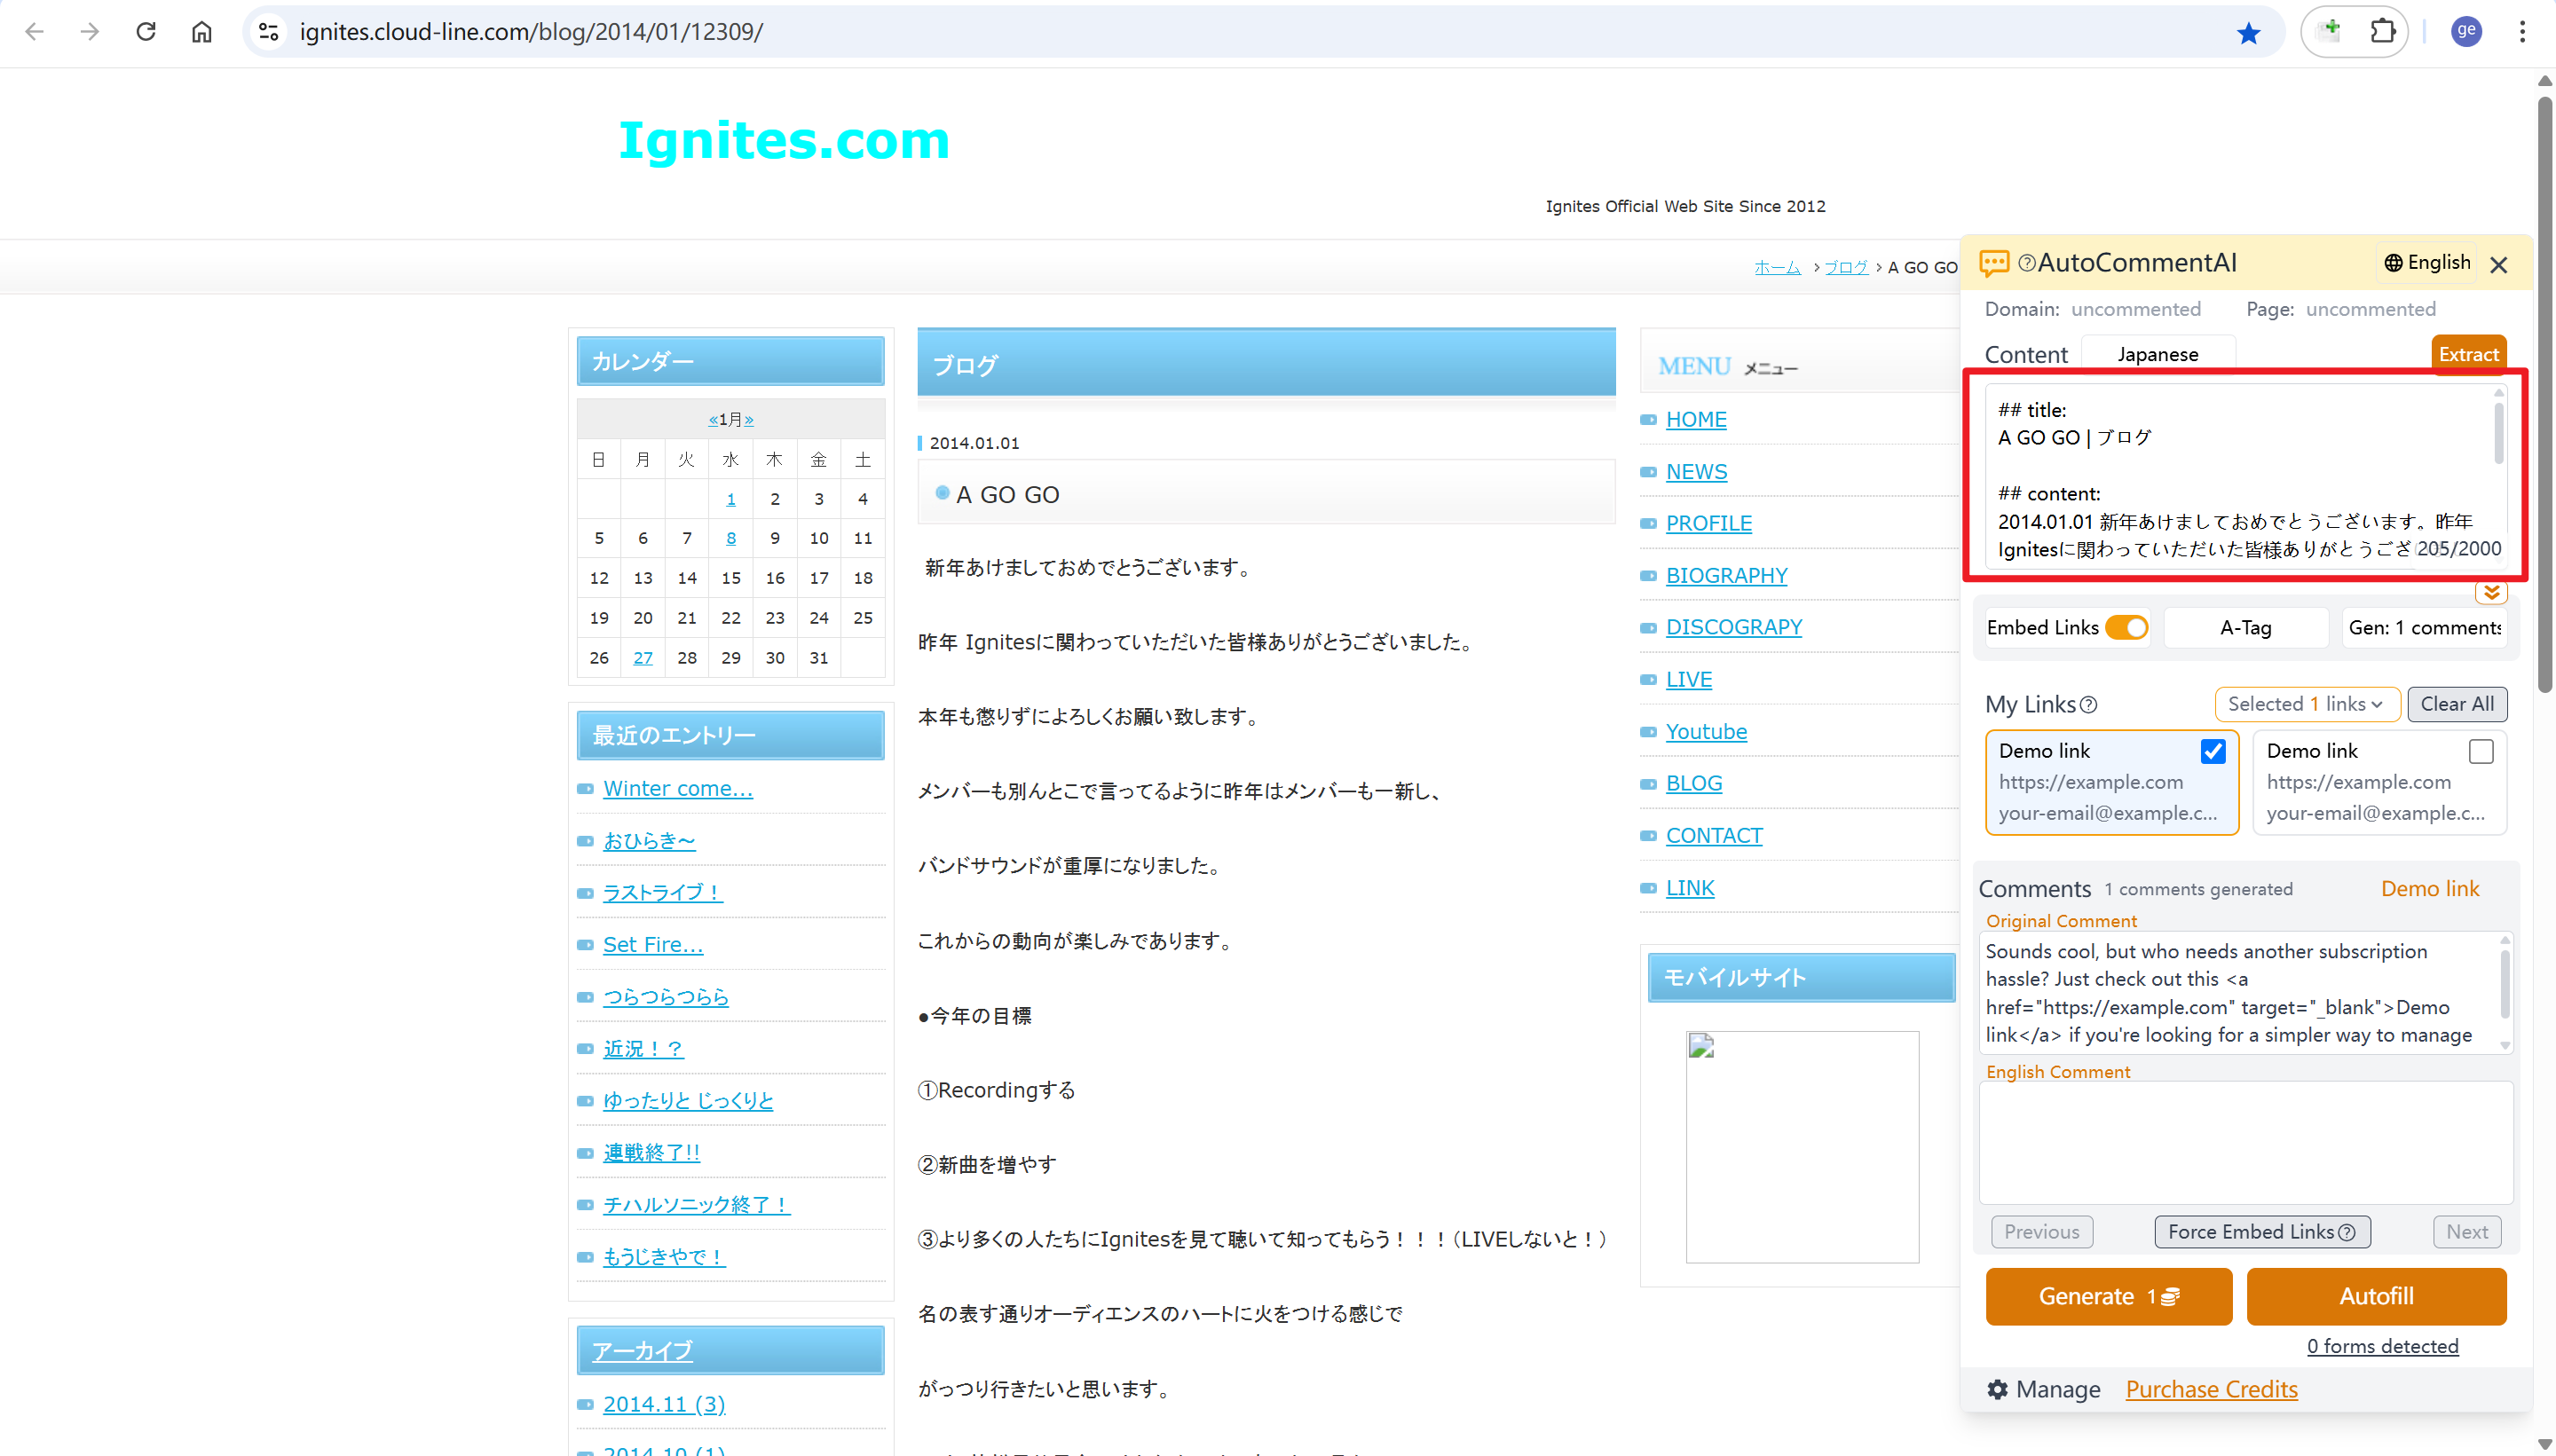
4. View Auto-Extracted Page Content
Go to any page where you want to post a comment (blog, forum, news site, etc.).
Click the sidebar toggle to open the panel.
Normally, the plugin will automatically extract the main content of the page into a text box.
If it fails, you can manually paste the content.
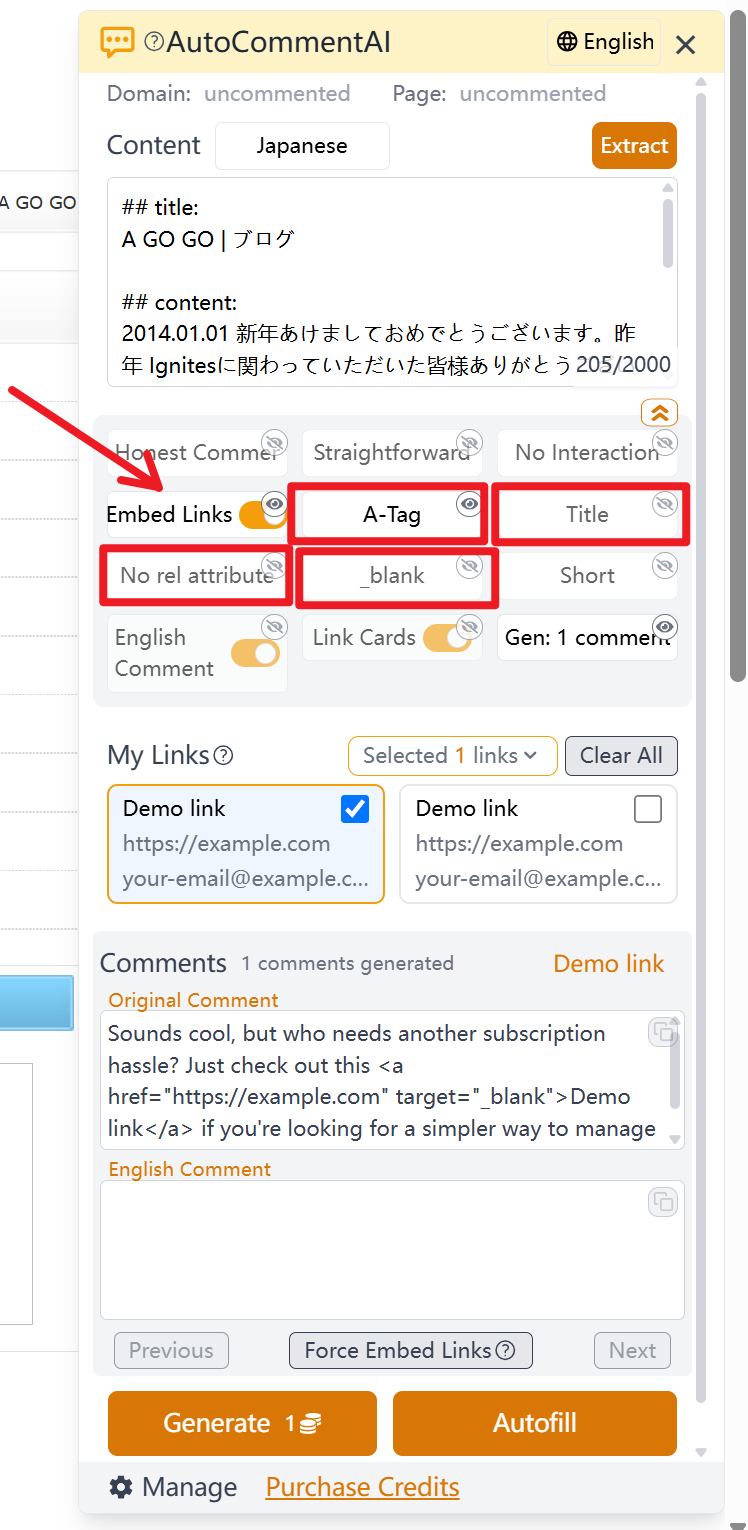
5. Configure Comment Options
You can customize:
- Role/persona
- Comment style
- Interactivity
- Whether to embed links
- Link format
- Comment length
- Number of comments per batch
Feel free to send suggestions for custom options!
6. Set Up Embedded Links
This feature helps naturally mention your site and embed the URL in the comment without being intrusive.
- Toggle “Embed Link” in the sidebar to enable the feature.
- Choose one of four formats:
<a>tag, Markdown, BBCode, or raw URL—covers 99% of cases.
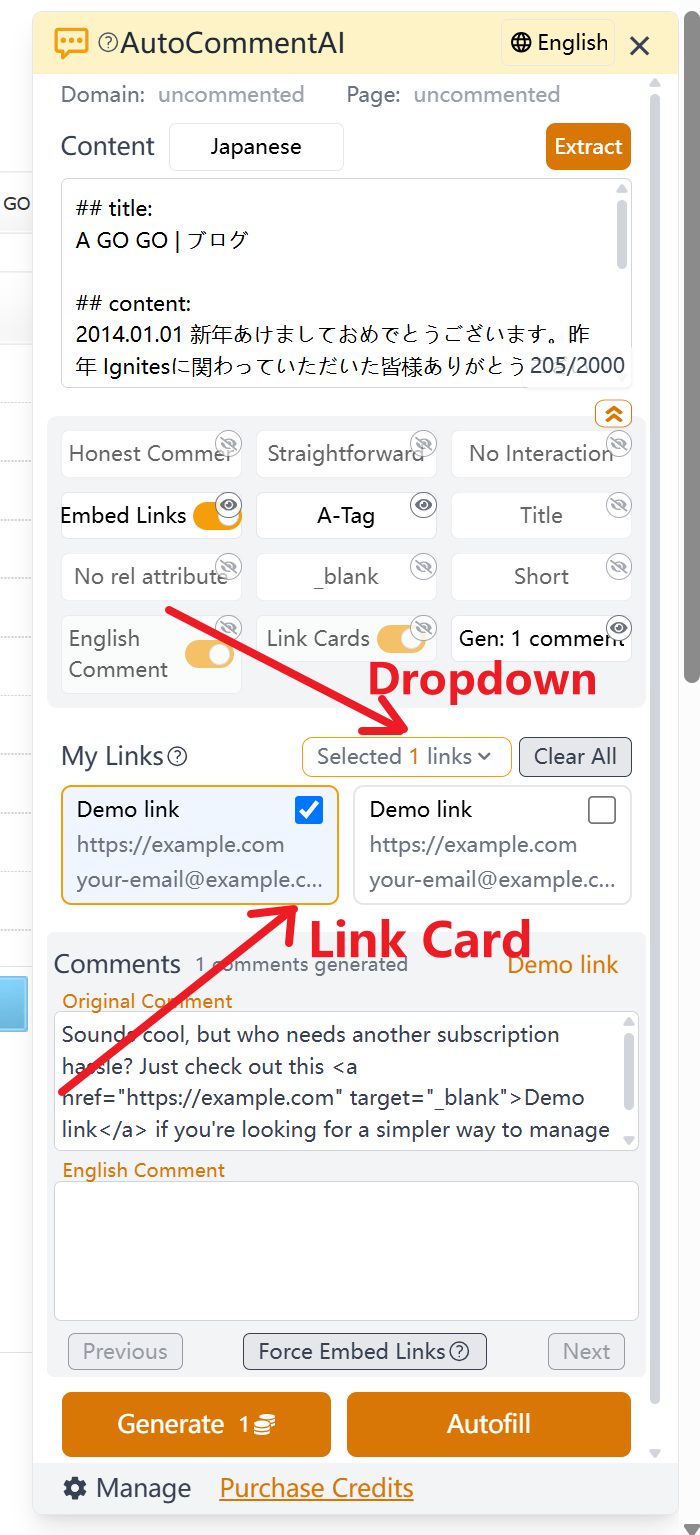
7. Select Links to Embed (Optional)
If link embedding is enabled, you must select the same number of links as comments you want to generate.
For example, to generate 3 comments, select 3 links from “My Links.” Each generated comment will embed one of the selected links.
8. Generate Comments
Click the “Generate Comments” button.
Each comment takes a few seconds. Generating several at once usually completes in under 10 seconds.
9. Auto-Fill Comment Forms
1) Auto-Fill:
After generating, click “Auto-Fill” to populate the comment form with the selected comment and its associated link (title, URL, email).
2) Comment-Link Sync:
If link embedding was enabled, each comment is bound to a specific link.
Scrolling through comments will auto-focus the corresponding link in the center, and vice versa.
This is especially useful for promoting multiple websites.
If you’re promoting 5 sites and generate 5 comments at once, scrolling through the comments also scrolls through the links—simplifying the workflow.
Additional Notes
1) Link data is stored locally
Links you add through the backend are stored in local browser storage (to protect sensitive data).
Please be cautious when clearing your browser cache, as all link data will be lost.
2) Configuration data is also stored locally
All configuration settings are saved in the browser’s local cache.
If the cache is cleared, settings will revert to default.
Due to space limitations, for more detailed installation and usage instructions, please refer to the User Guide
Plugin install link: AutoCommentAI on Chrome Web Store
Finally, since the plugin was just recently developed, there may still be bugs or shortcomings.
Any feedback, suggestions, or feature requests are greatly welcome!