Welcome to AutoCommentAI 🎉
AutoCommentAI is a semi-automated Chrome extension designed to assist with backlink building. It automatically identifies the main content of blog and forum posts, uses AI to generate natural, relevant comments (with support for inserting promotional links), and then autofills the comment form with a single click. The entire process, from comment generation to submission, requires just a few clicks, saving you significant time and boosting your efficiency so you can focus on what truly matters.
Key Features
- 🔍 Intelligent Content Extraction Automatically identifies and extracts the core content of blog or forum posts, filtering out ads, pop-ups, and other page clutter to ensure generated comments are always on-topic.
- 🤖 Natural, Relevant, and Interactive Comment Generation Generate natural-looking, context-aware, and engaging comments with one click. You can quickly set the commenter’s persona, tone, style, and level of interaction.
- 🔗 Seamless Link Embedding in Comments Effortlessly insert promotional links into comments, making them appear natural and non-intrusive to enhance your promotion effectiveness.
- 📦 Batch Comment Generation Generate multiple personalized comments at once, each capable of embedding a different link. This is especially useful for SEO backlink building and content marketing.
- ⚡ Automatic Comment Form Detection and Filling Automatically detects and fills comment fields on the page (like name, email, website, and comment content), eliminating the need for copy-pasting.
- 🔐 Local-First Privacy All your data (links, preferences, settings) is stored locally in your browser. We never collect any personal information.
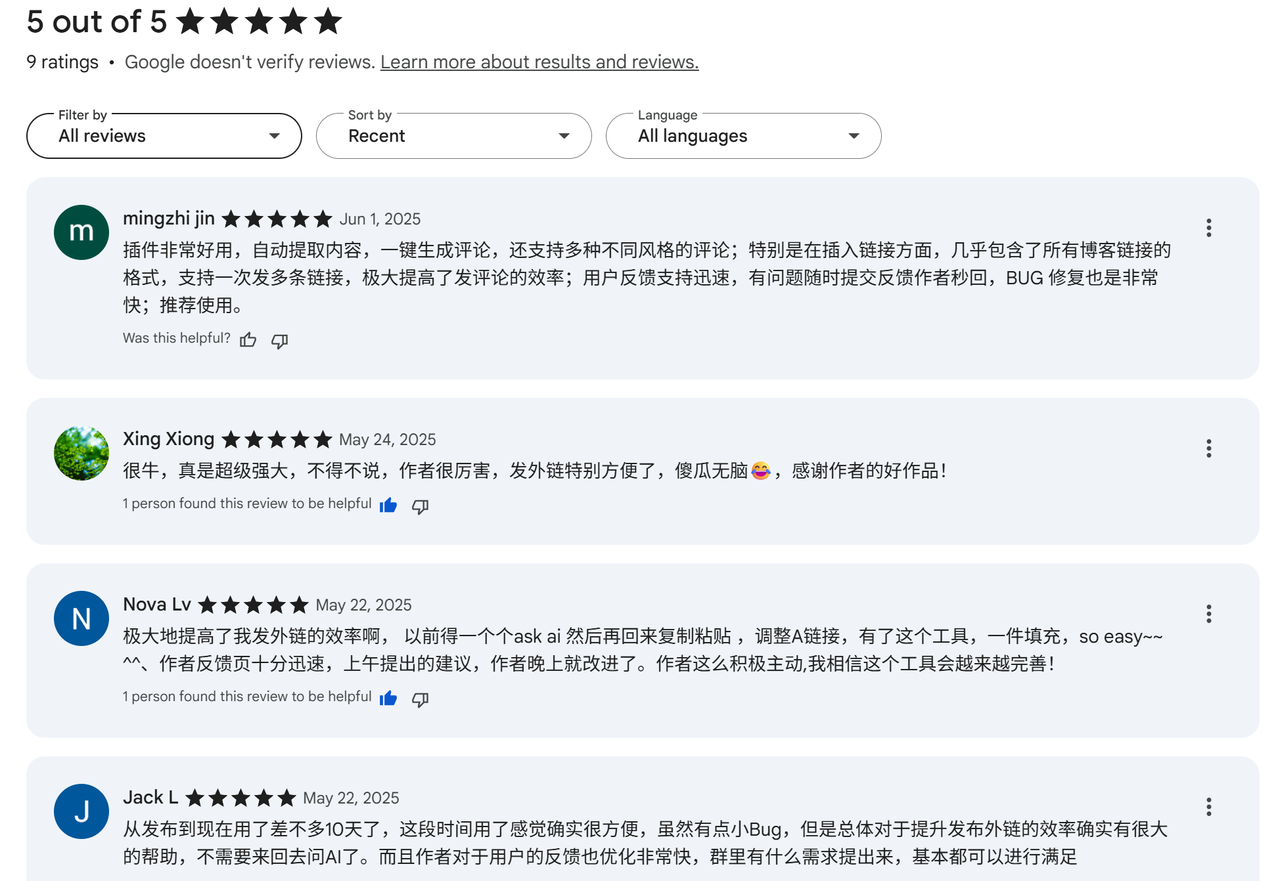
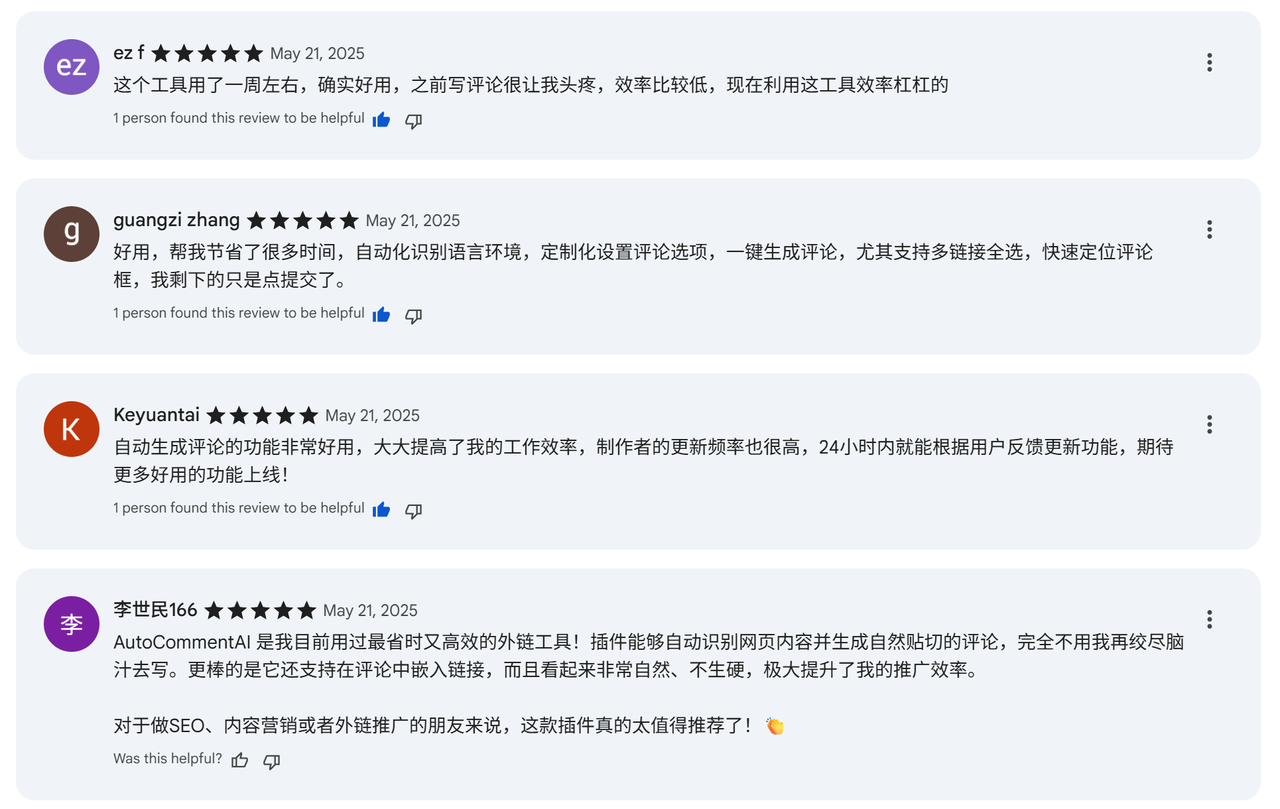
What Our Users Say
See what our users are saying 😊.
These are real user testimonials from the Chrome Web Store, from our chinese users.
How to Use AutoCommentAI
1. Extension Installation
Install the extension from the Chrome Web Store (works for both Chrome and Edge browsers): https://chromewebstore.google.com/detail/autocommentai/lnnbcbhcffnggkibgmhhjjgadjiainhd
2. Logging In
-
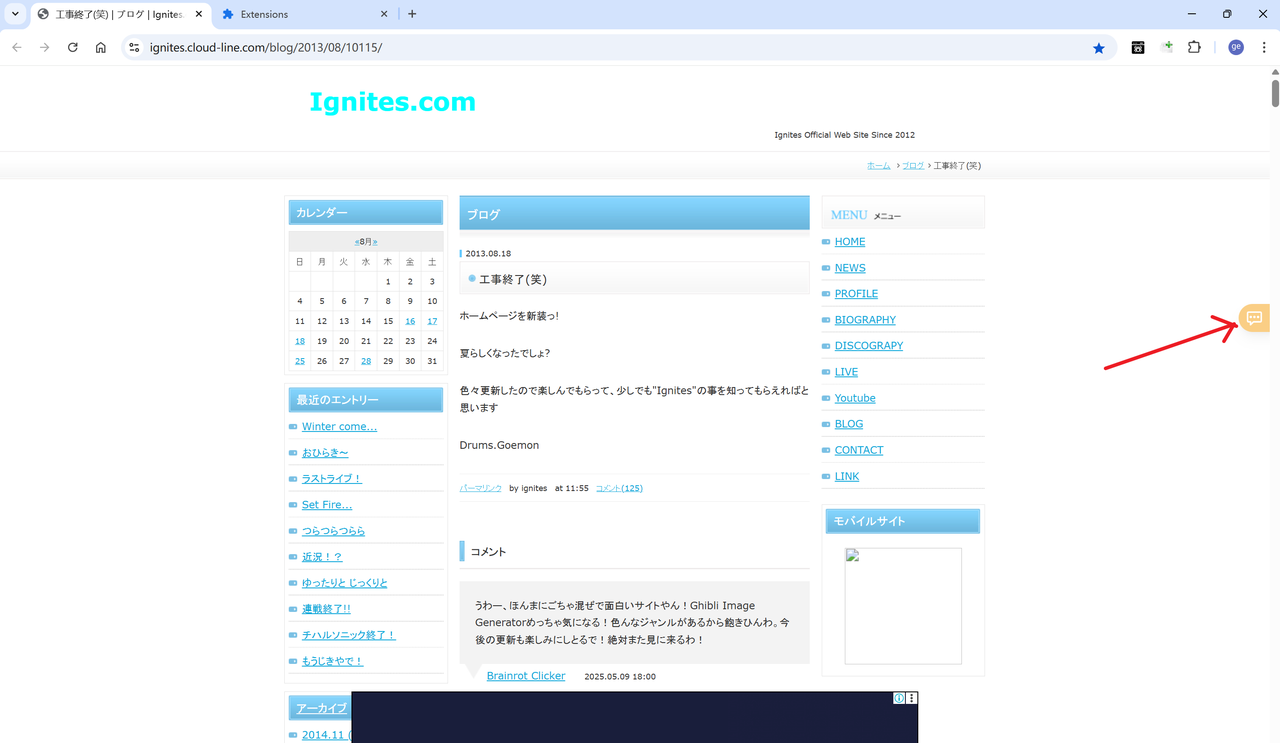
After installation, a side button will appear on the right side of any webpage. Click this icon to open the control panel, which will be your main entry point for using the extension.
-
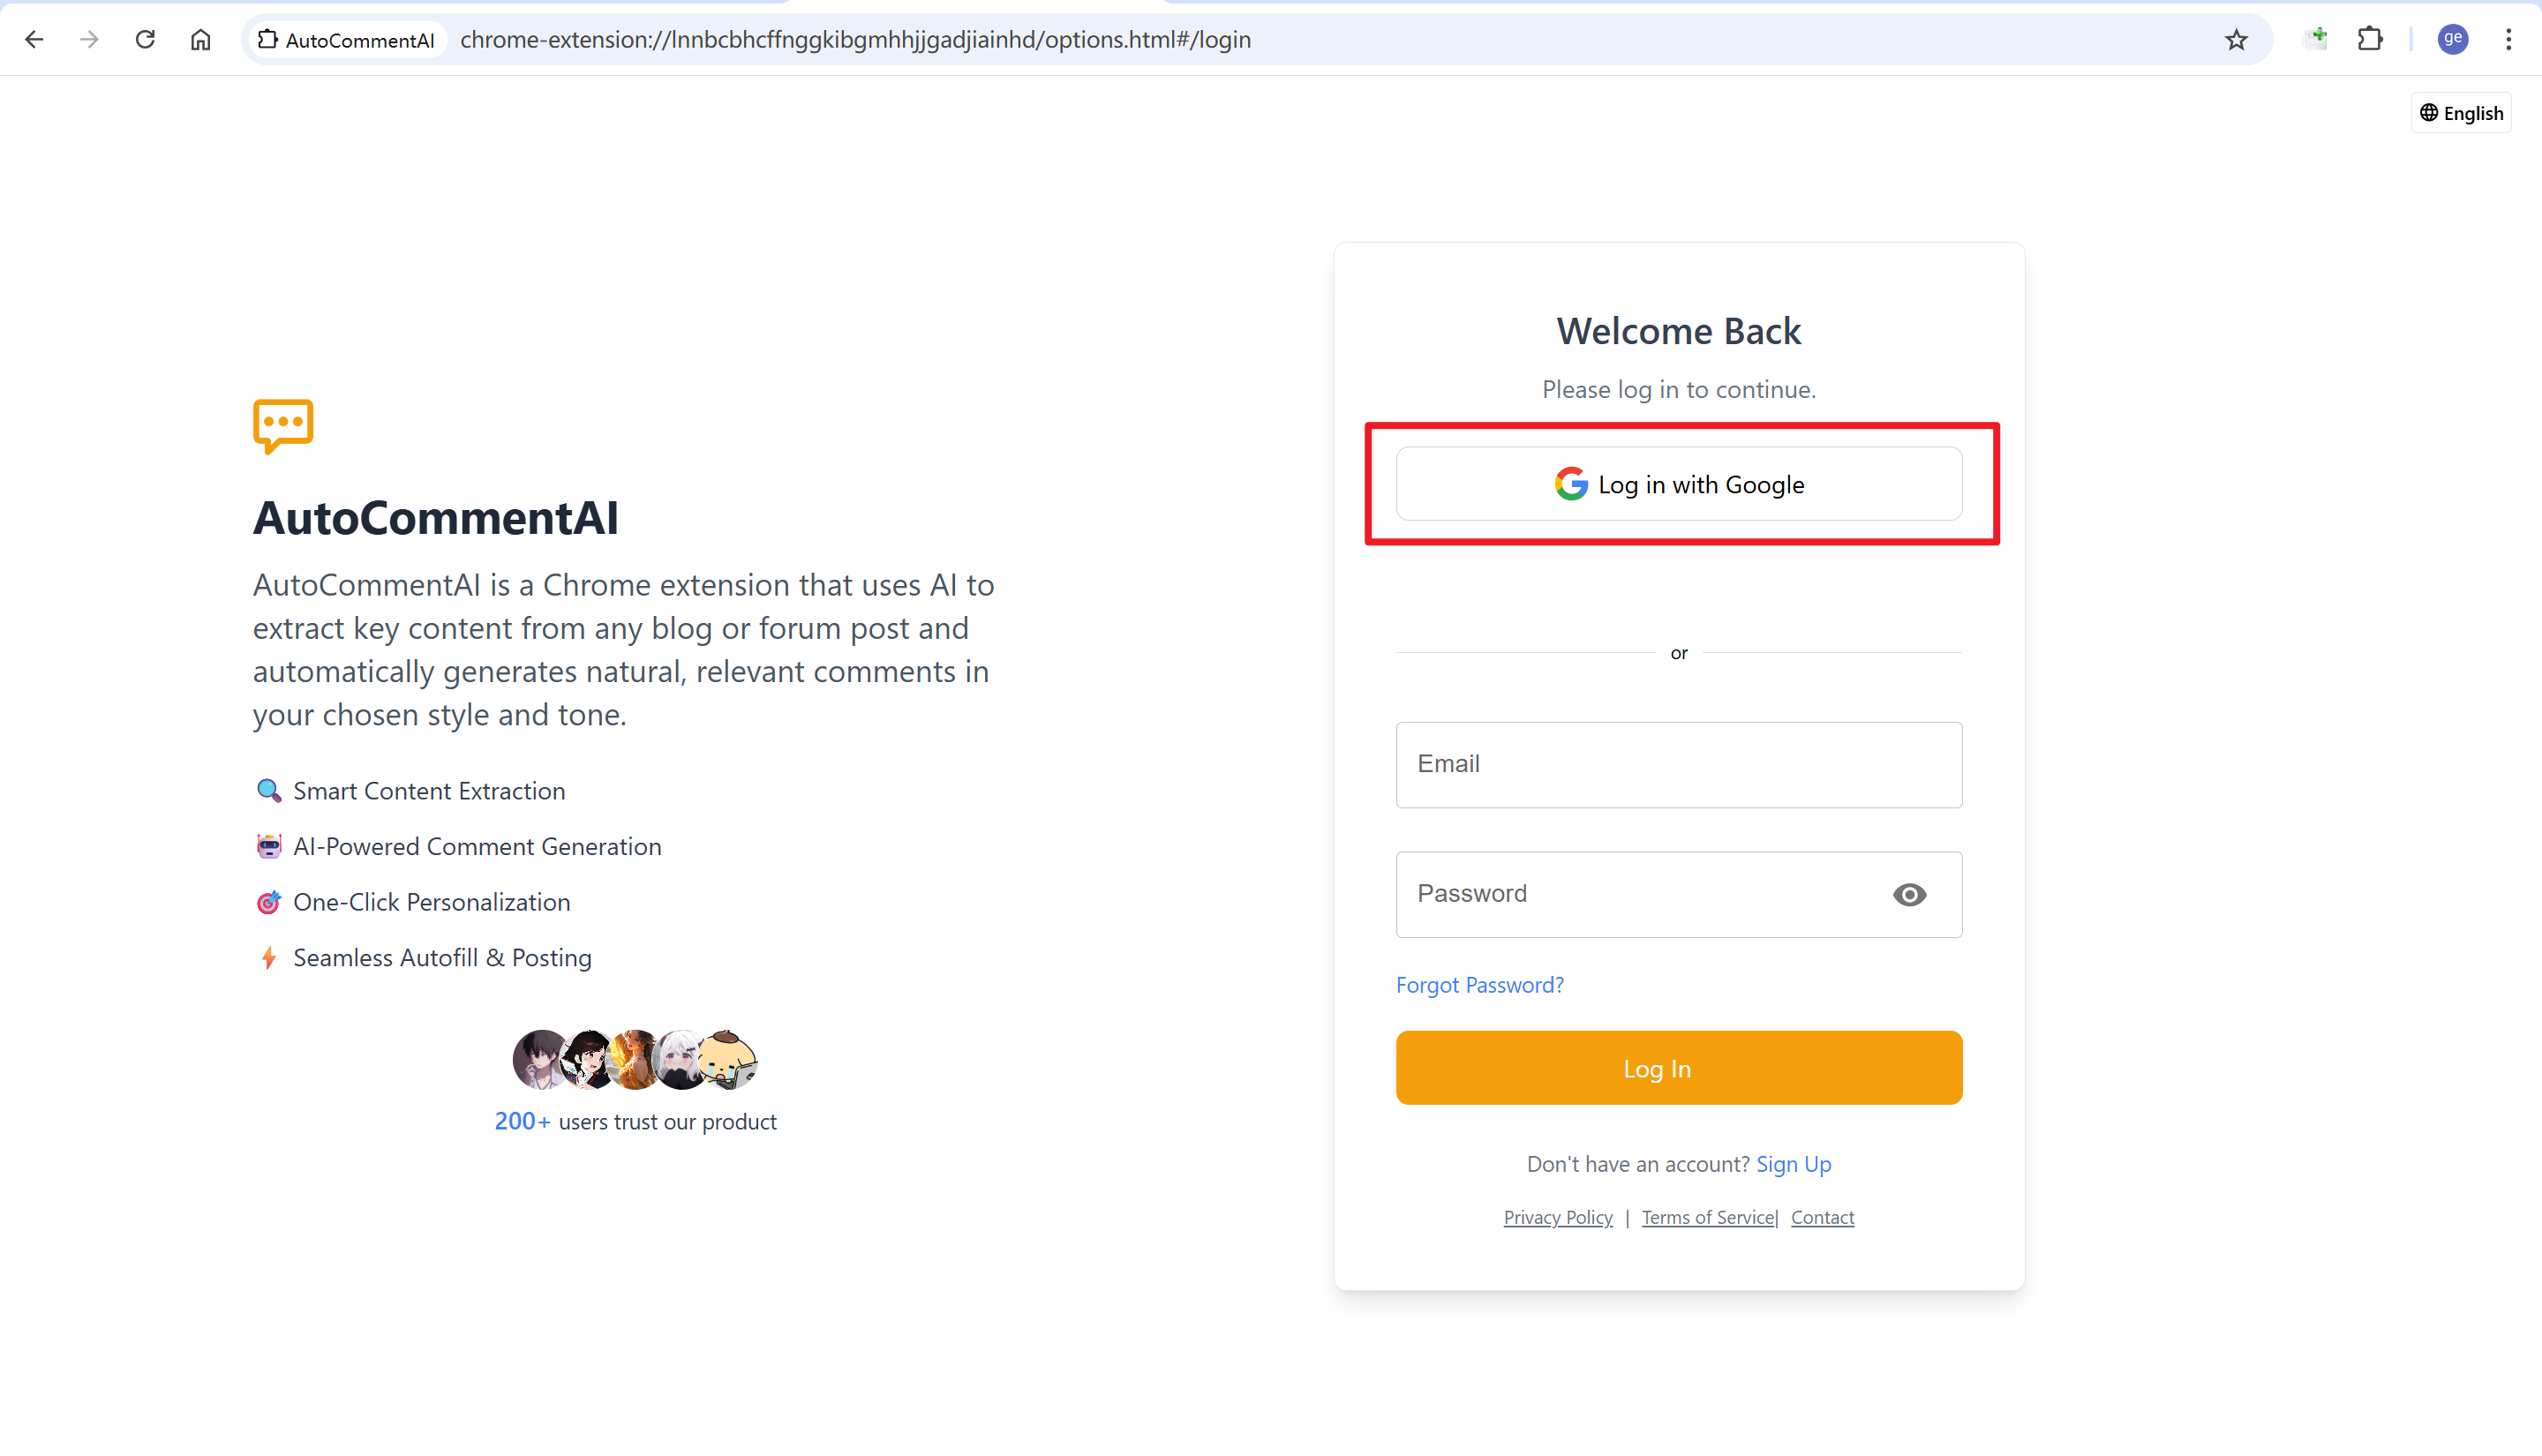
In the side panel, click the “Login” button to go to the login page. We currently support two login methods: logging in with your Google account or registering manually with your email. Follow the on-screen instructions to complete the login.
-
After logging in, return to the previous page. The side panel will now show your logged-in status.
3. Adding Your Website Links
-
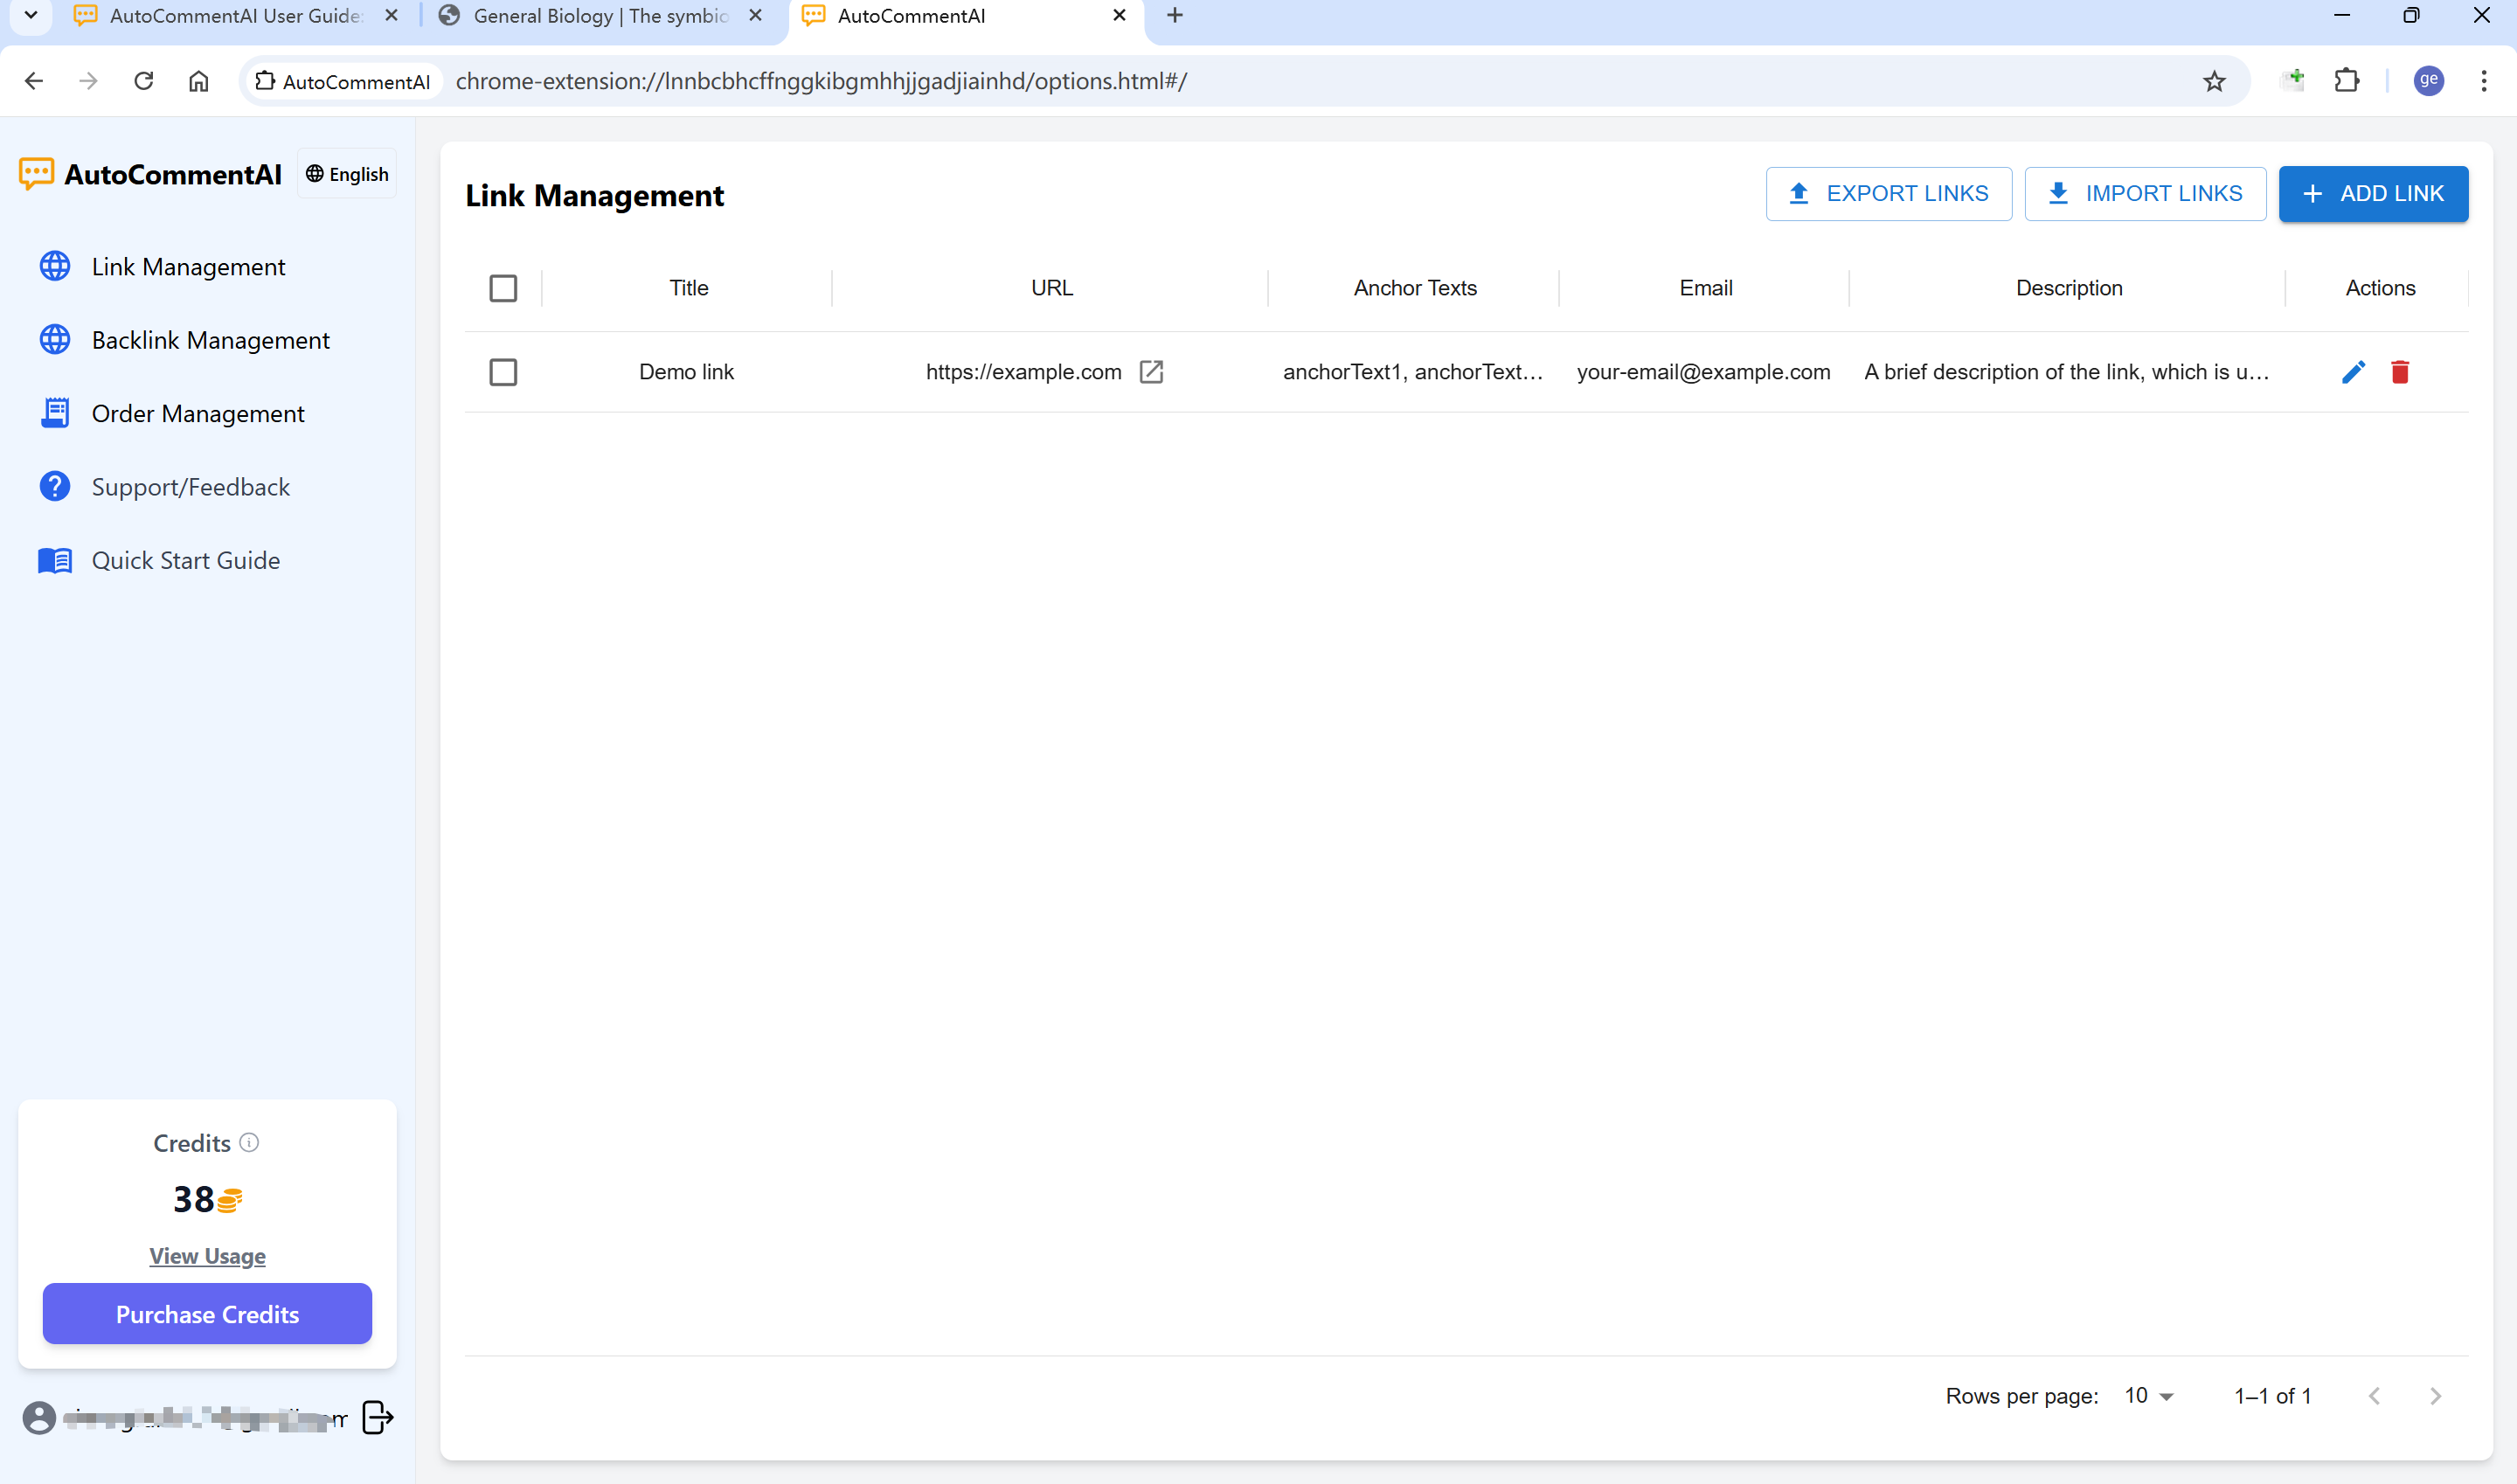
Access the Management Dashboard You will be automatically redirected to the management dashboard after logging in, or you can click the “Manage” button at the bottom of the side panel to access it.
-
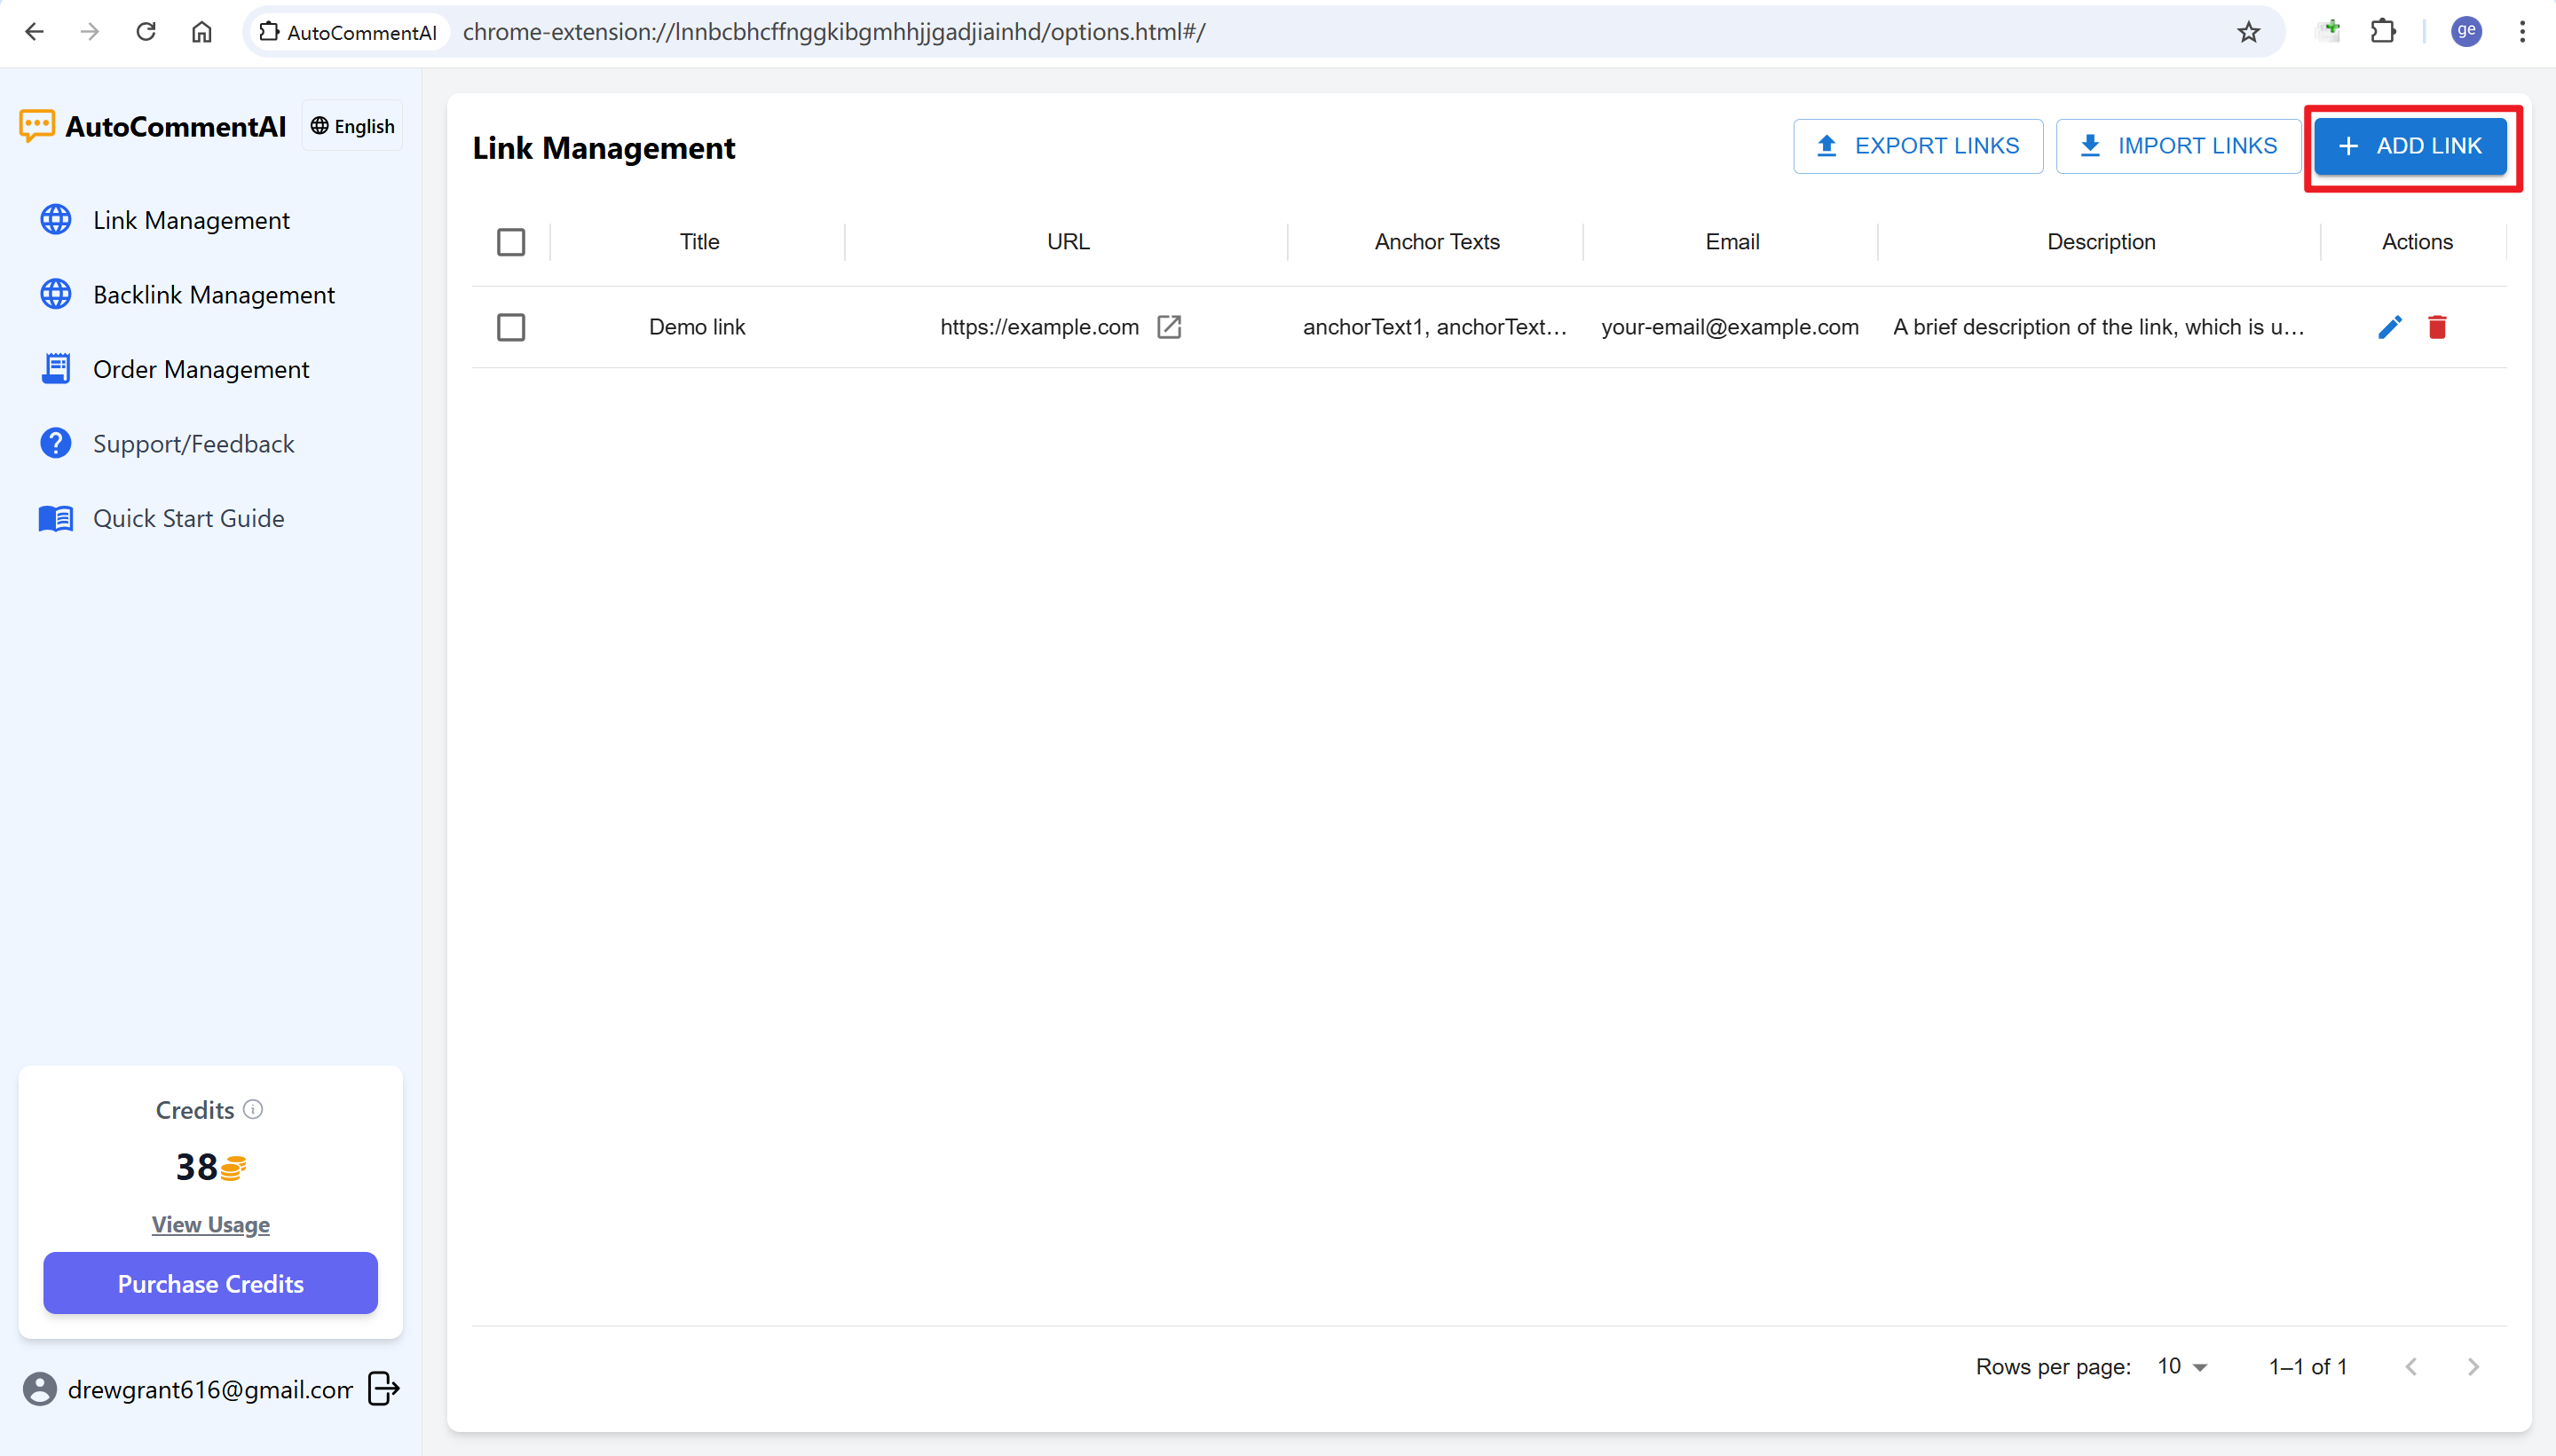
Add a Website Link Click the “Add Link” button in the top-right corner. Fill in the link title, URL, description, anchor texts, and email, then click “Save” to add a link.
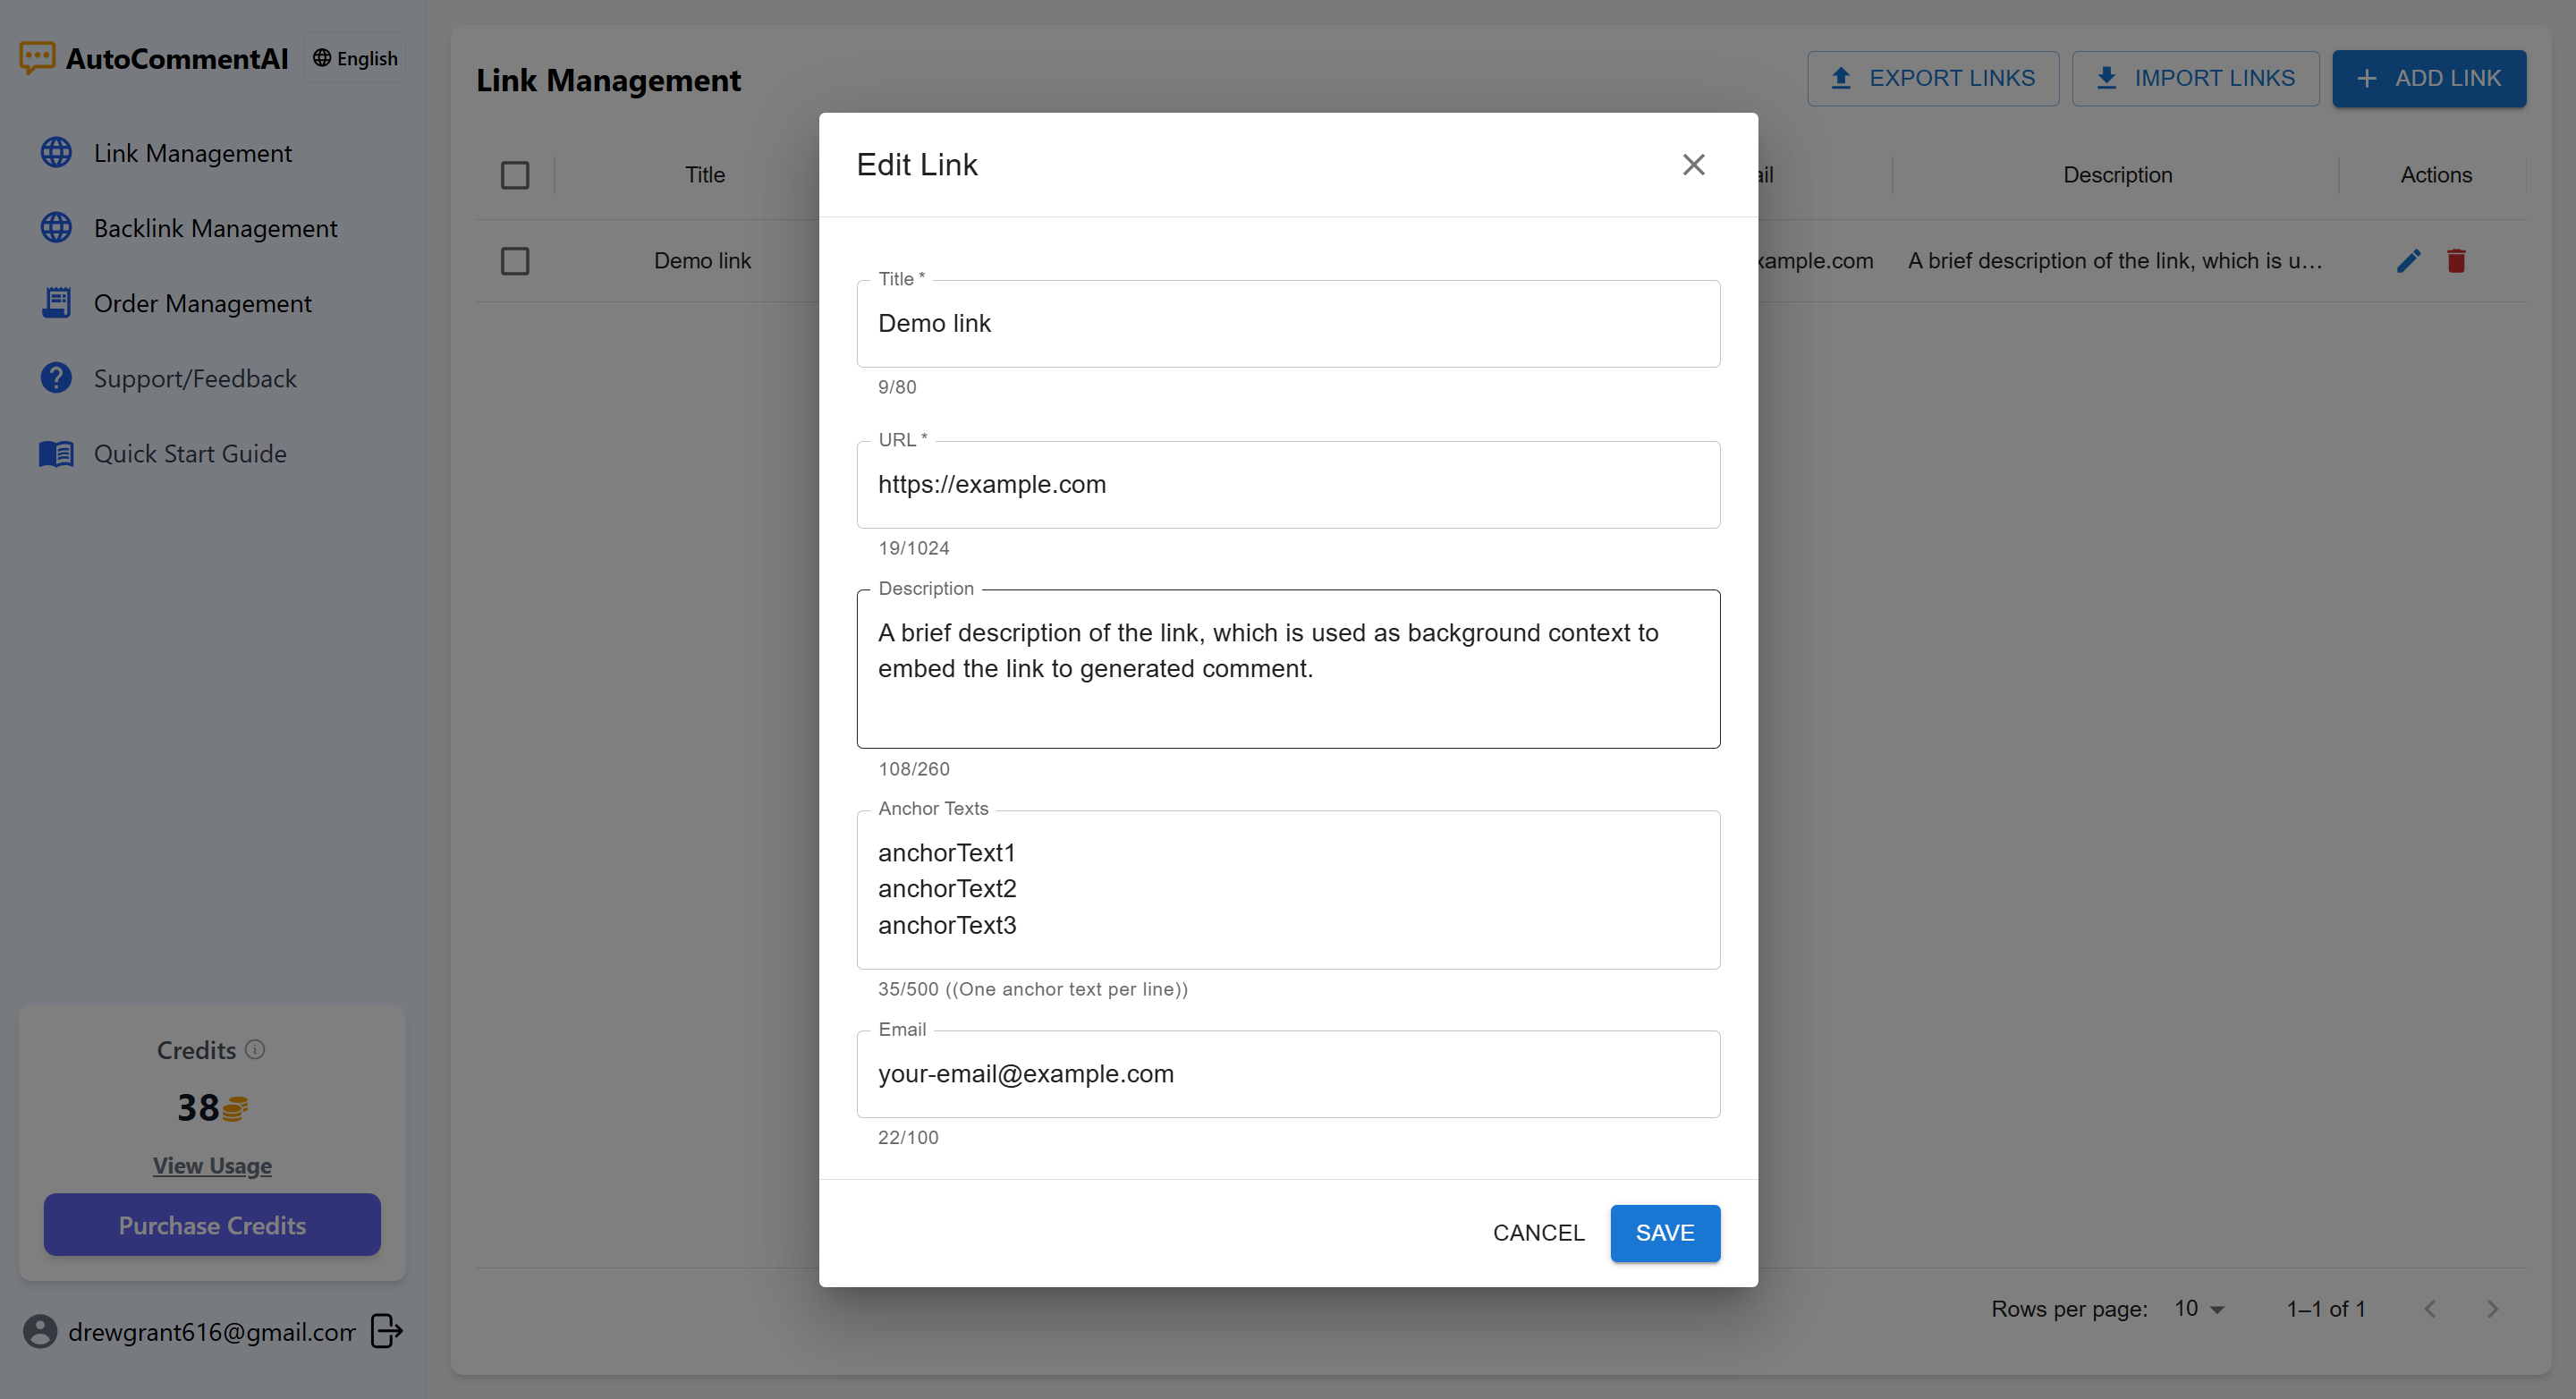
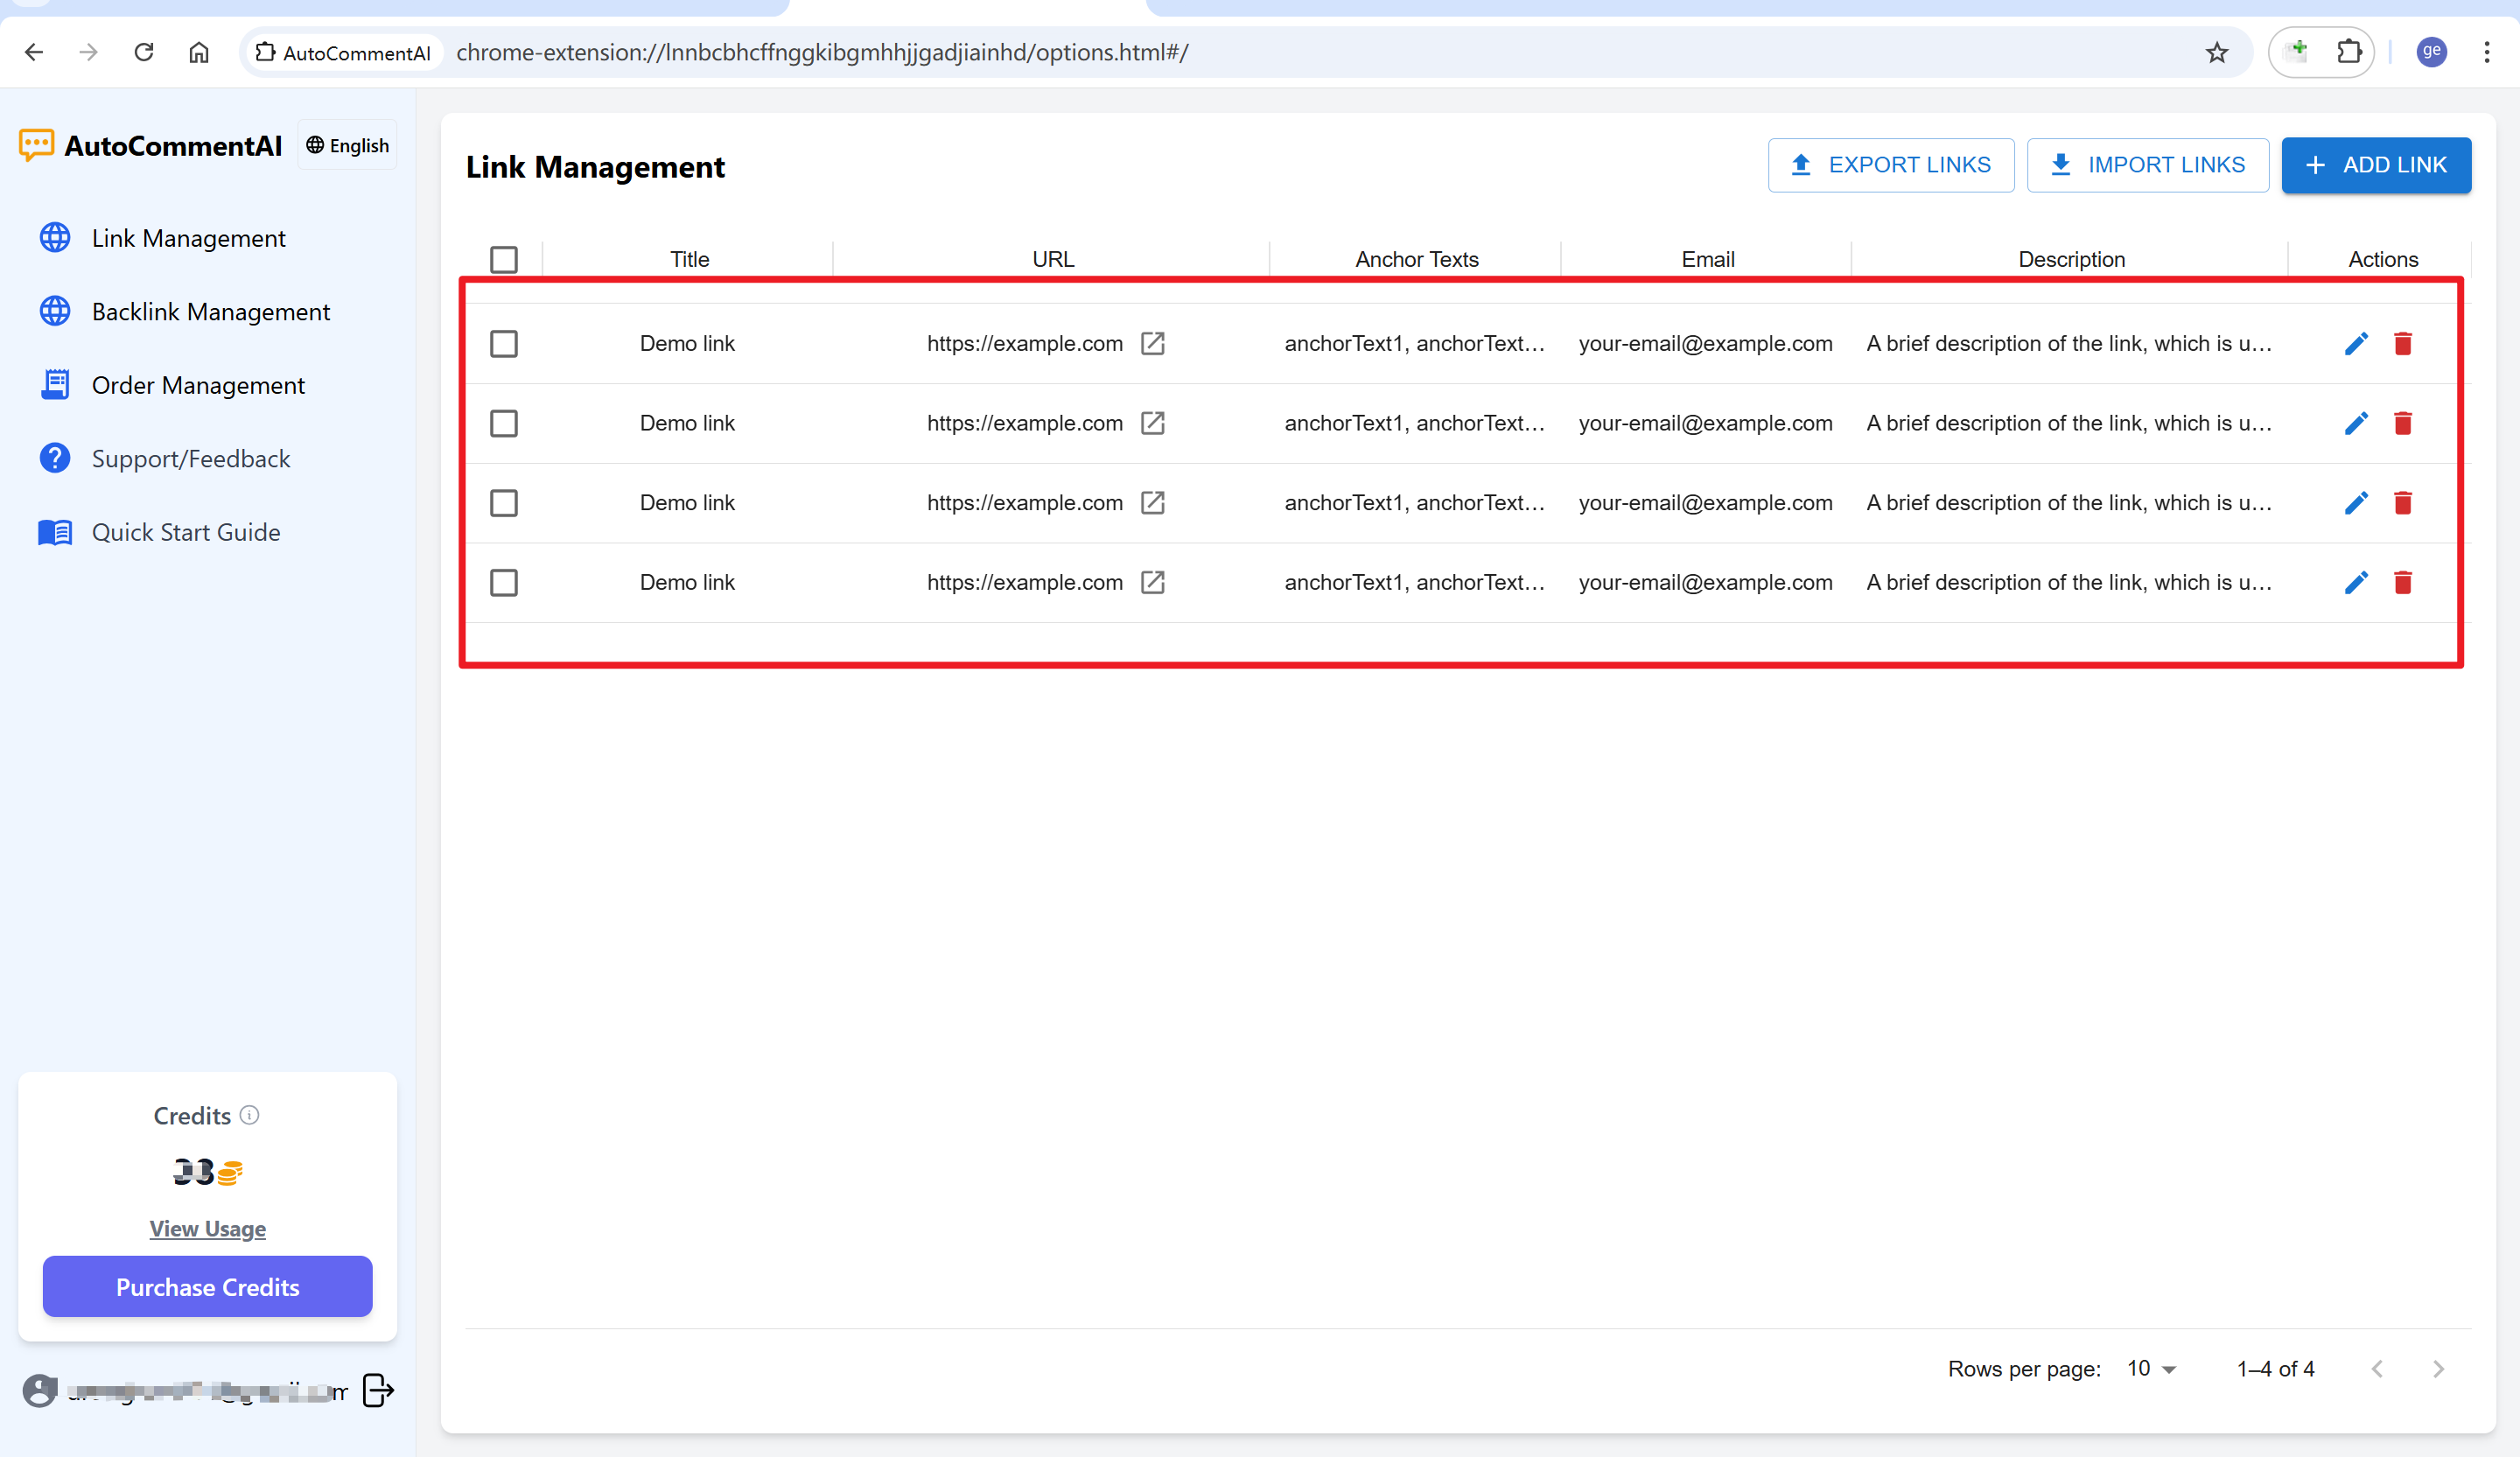
You can add multiple website links. After adding them, you will see a list of your links in the management dashboard, where you can edit or delete them. The default “Demo Link” can be deleted.
-
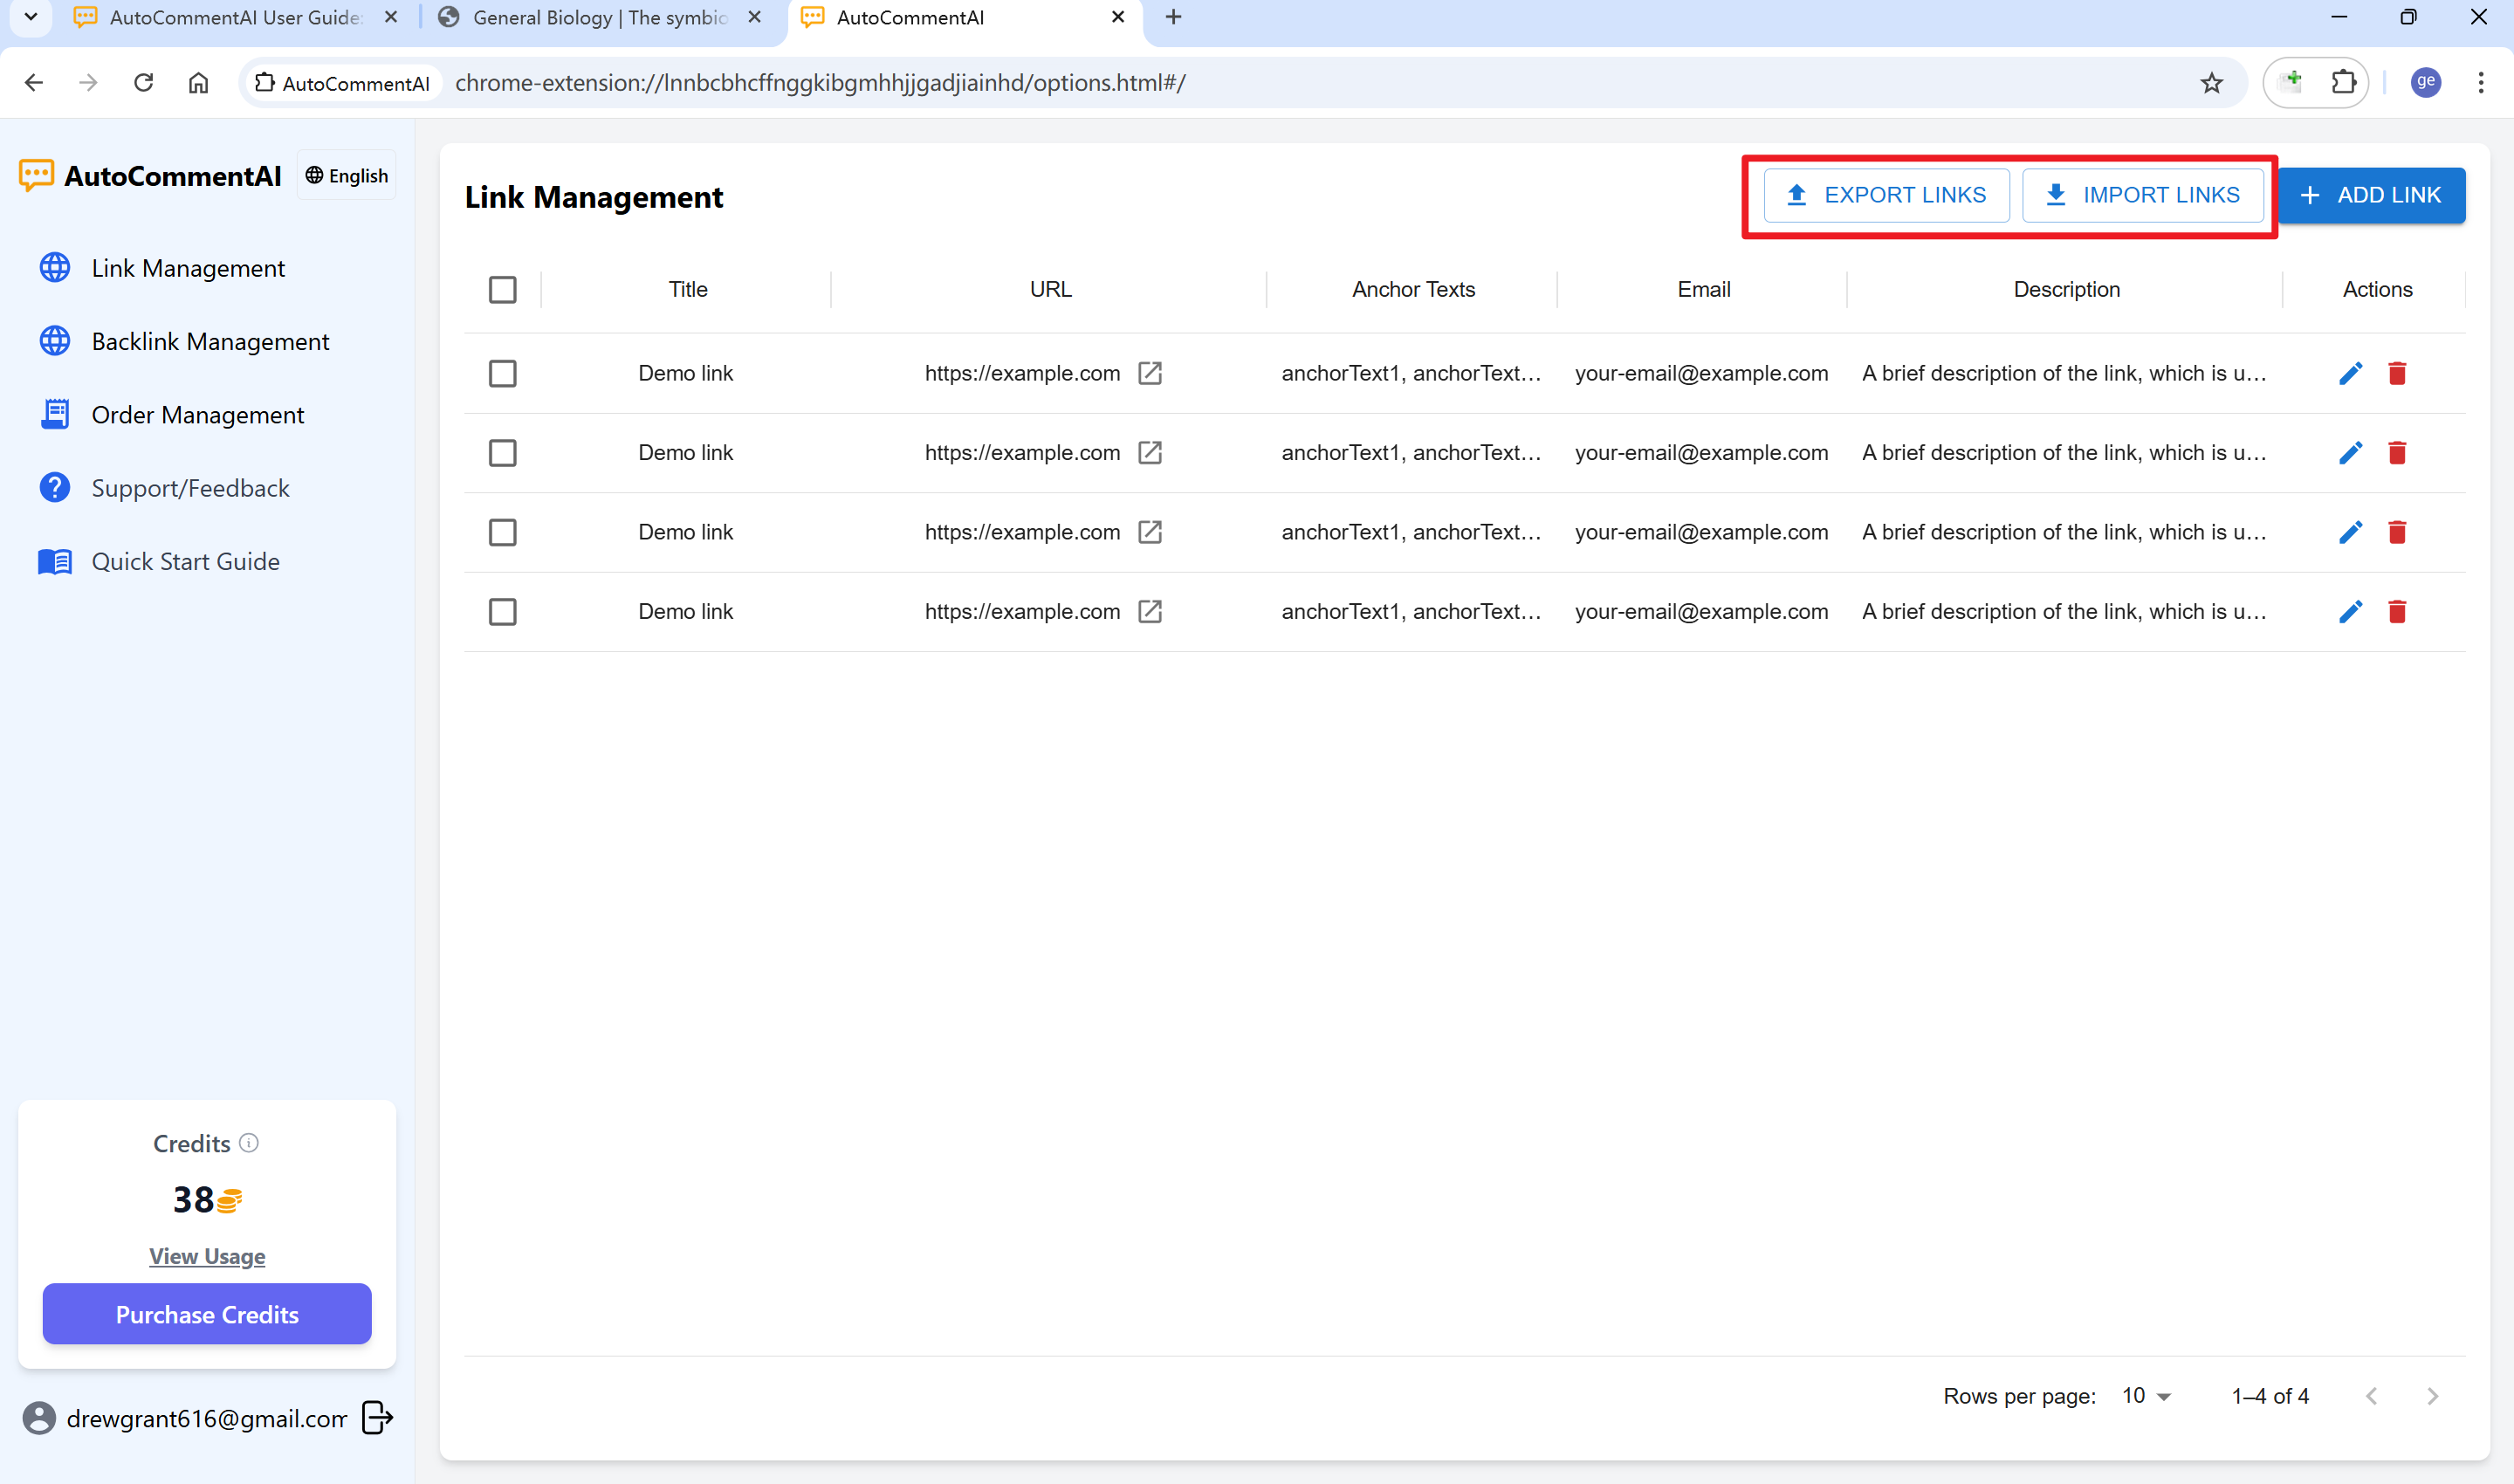
Import/Export and Batch Operations You can export your links to a json file and import them back later.
4. Viewing Auto-Extracted Page Content
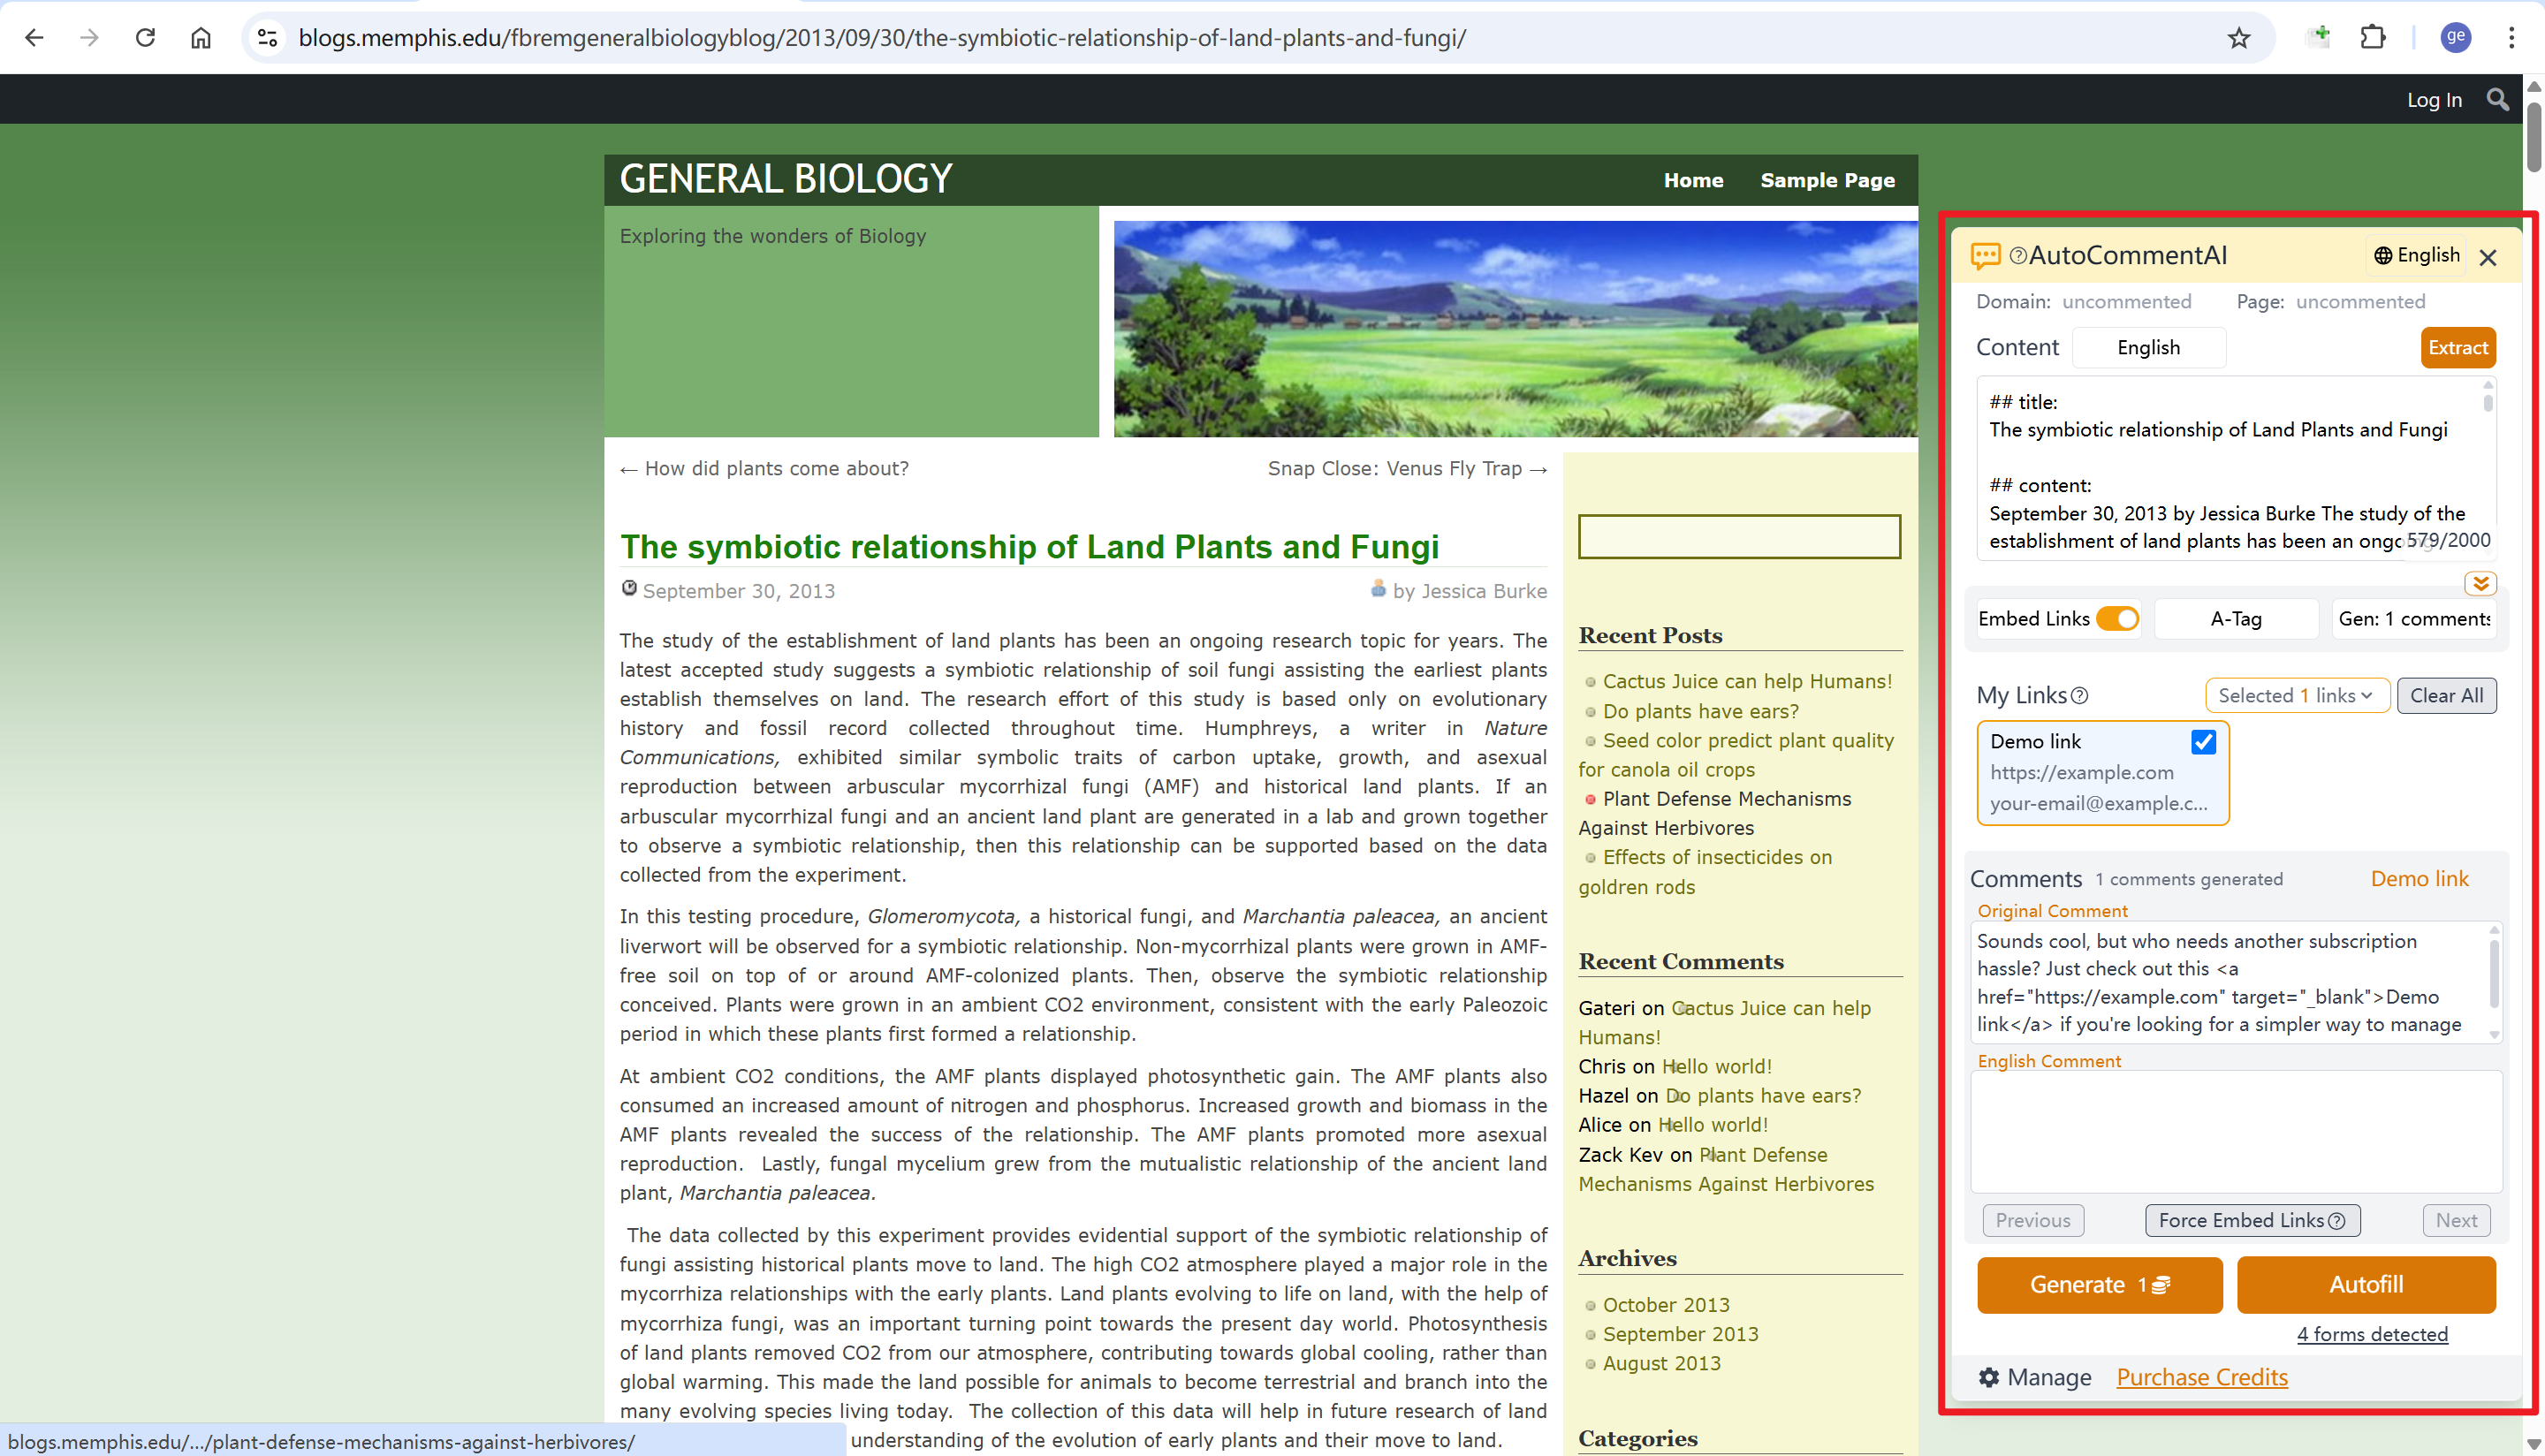
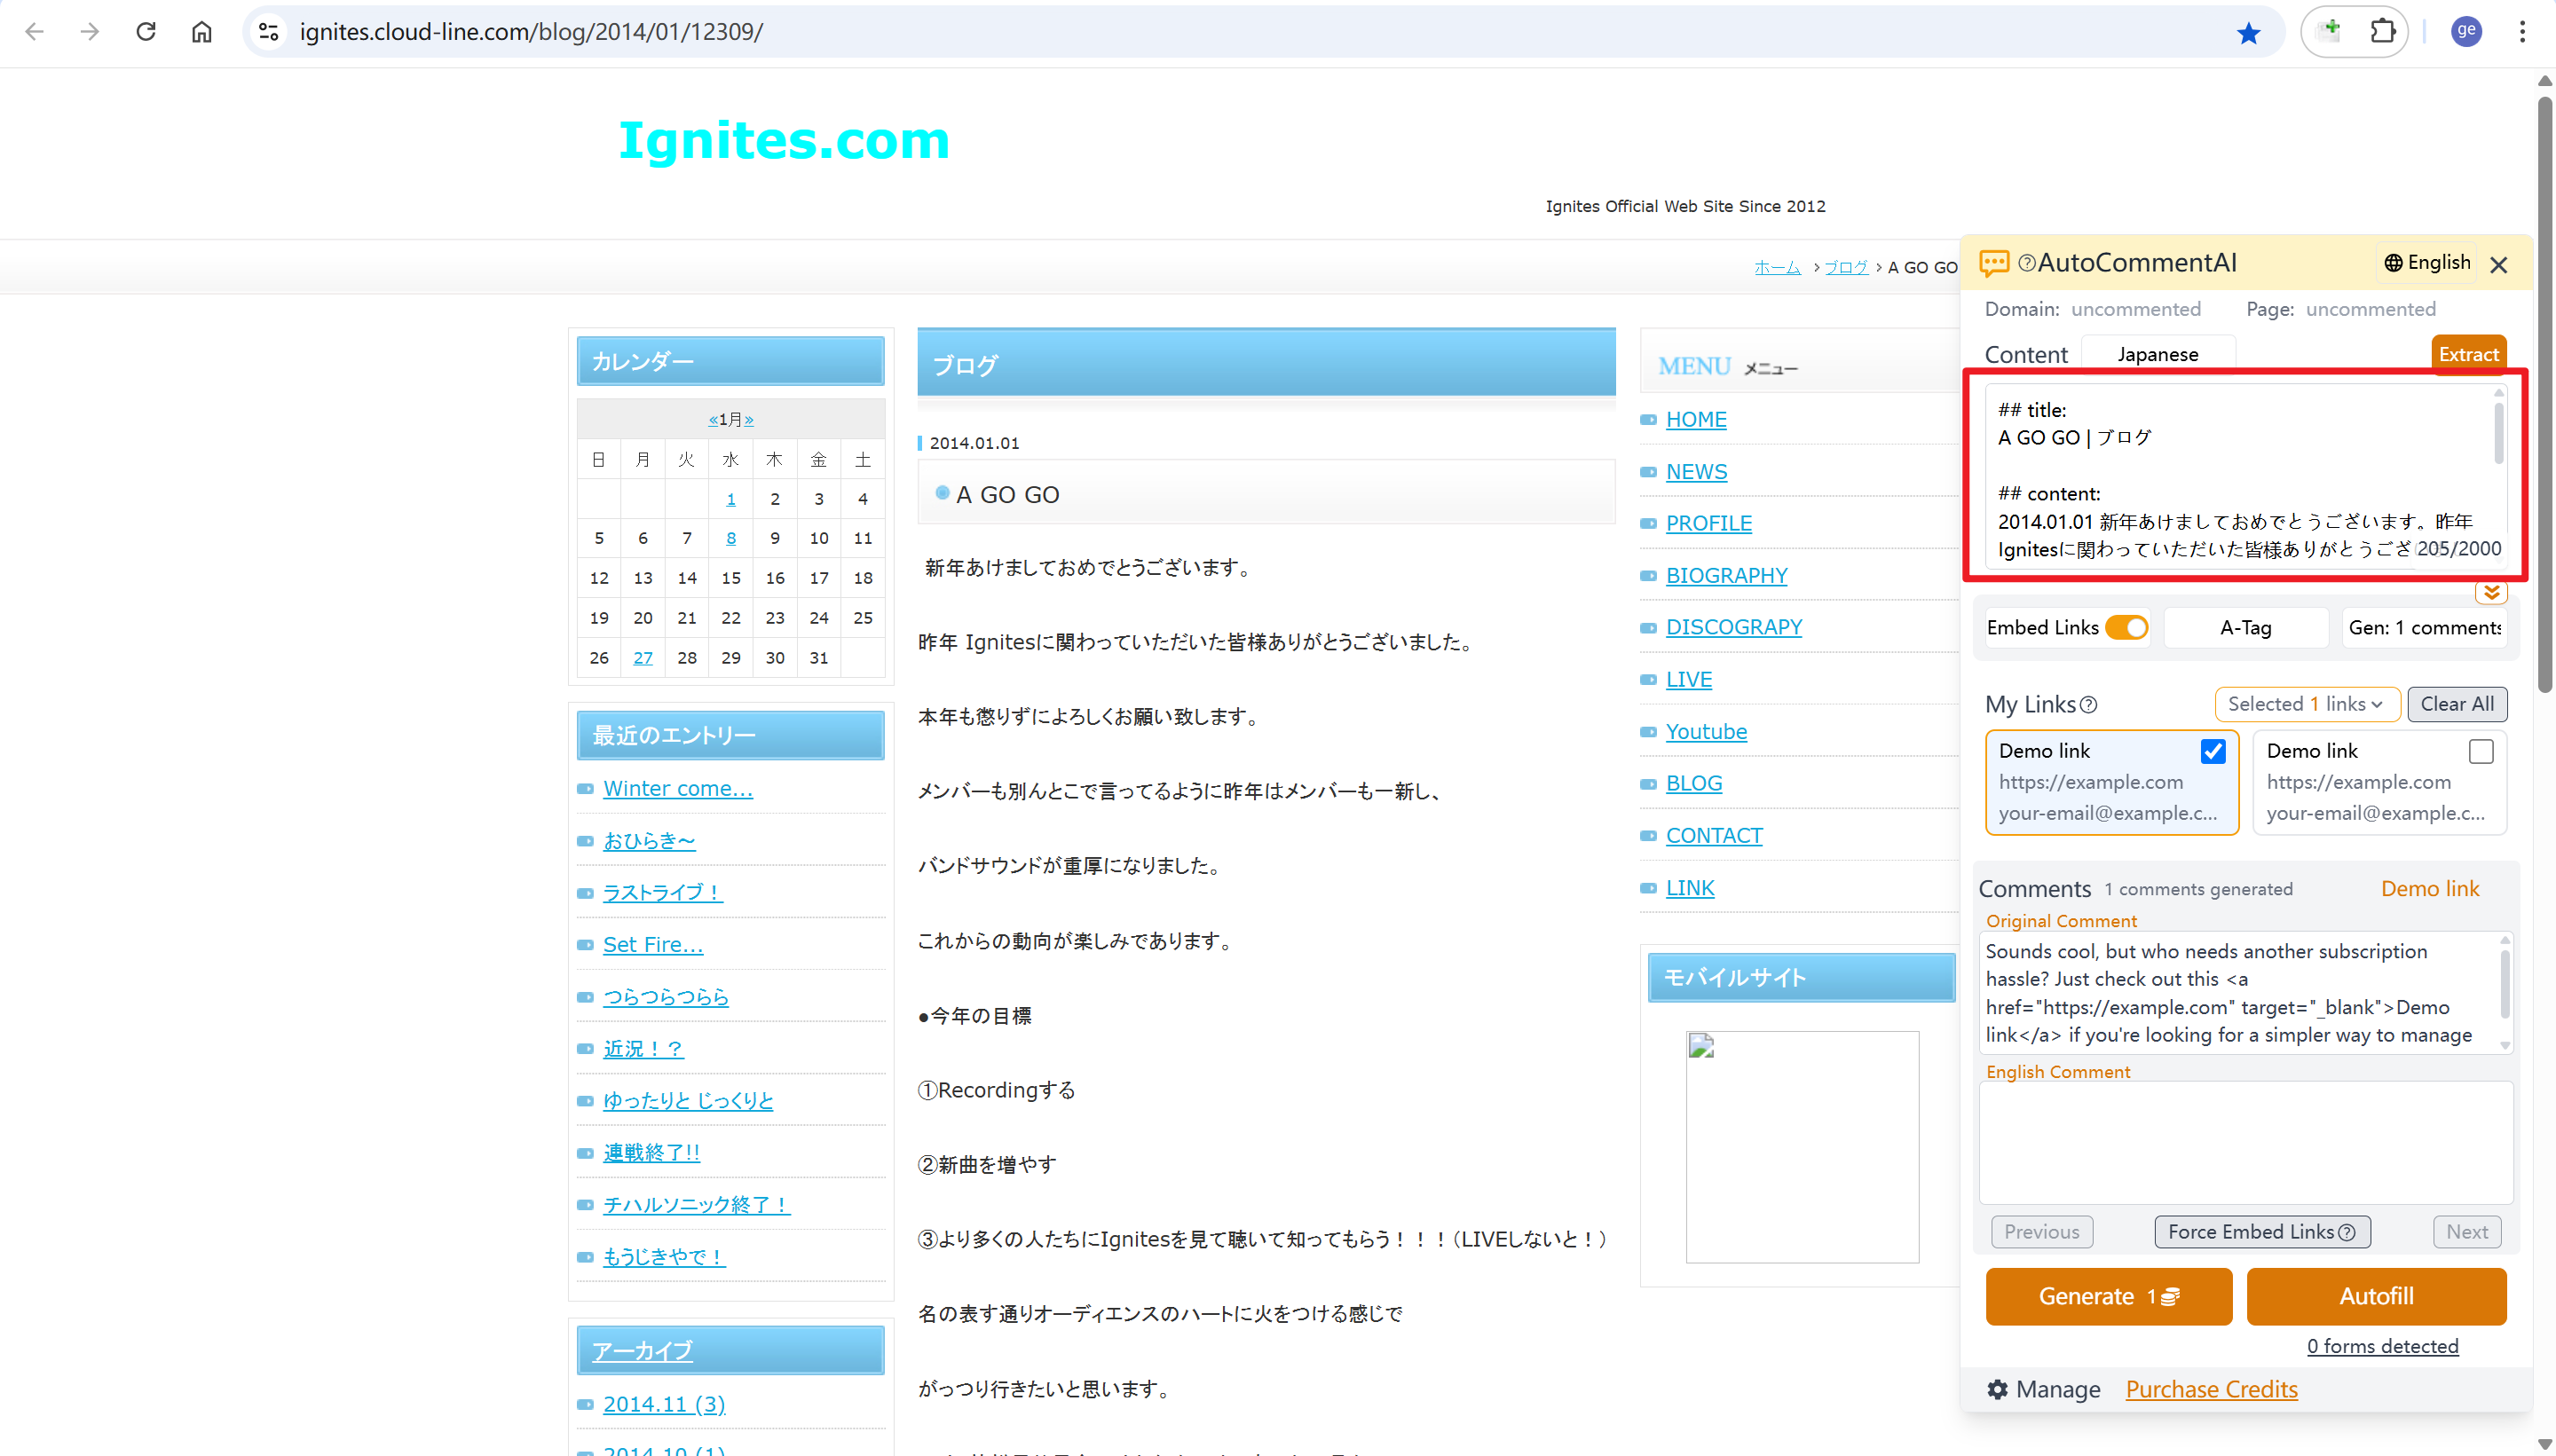
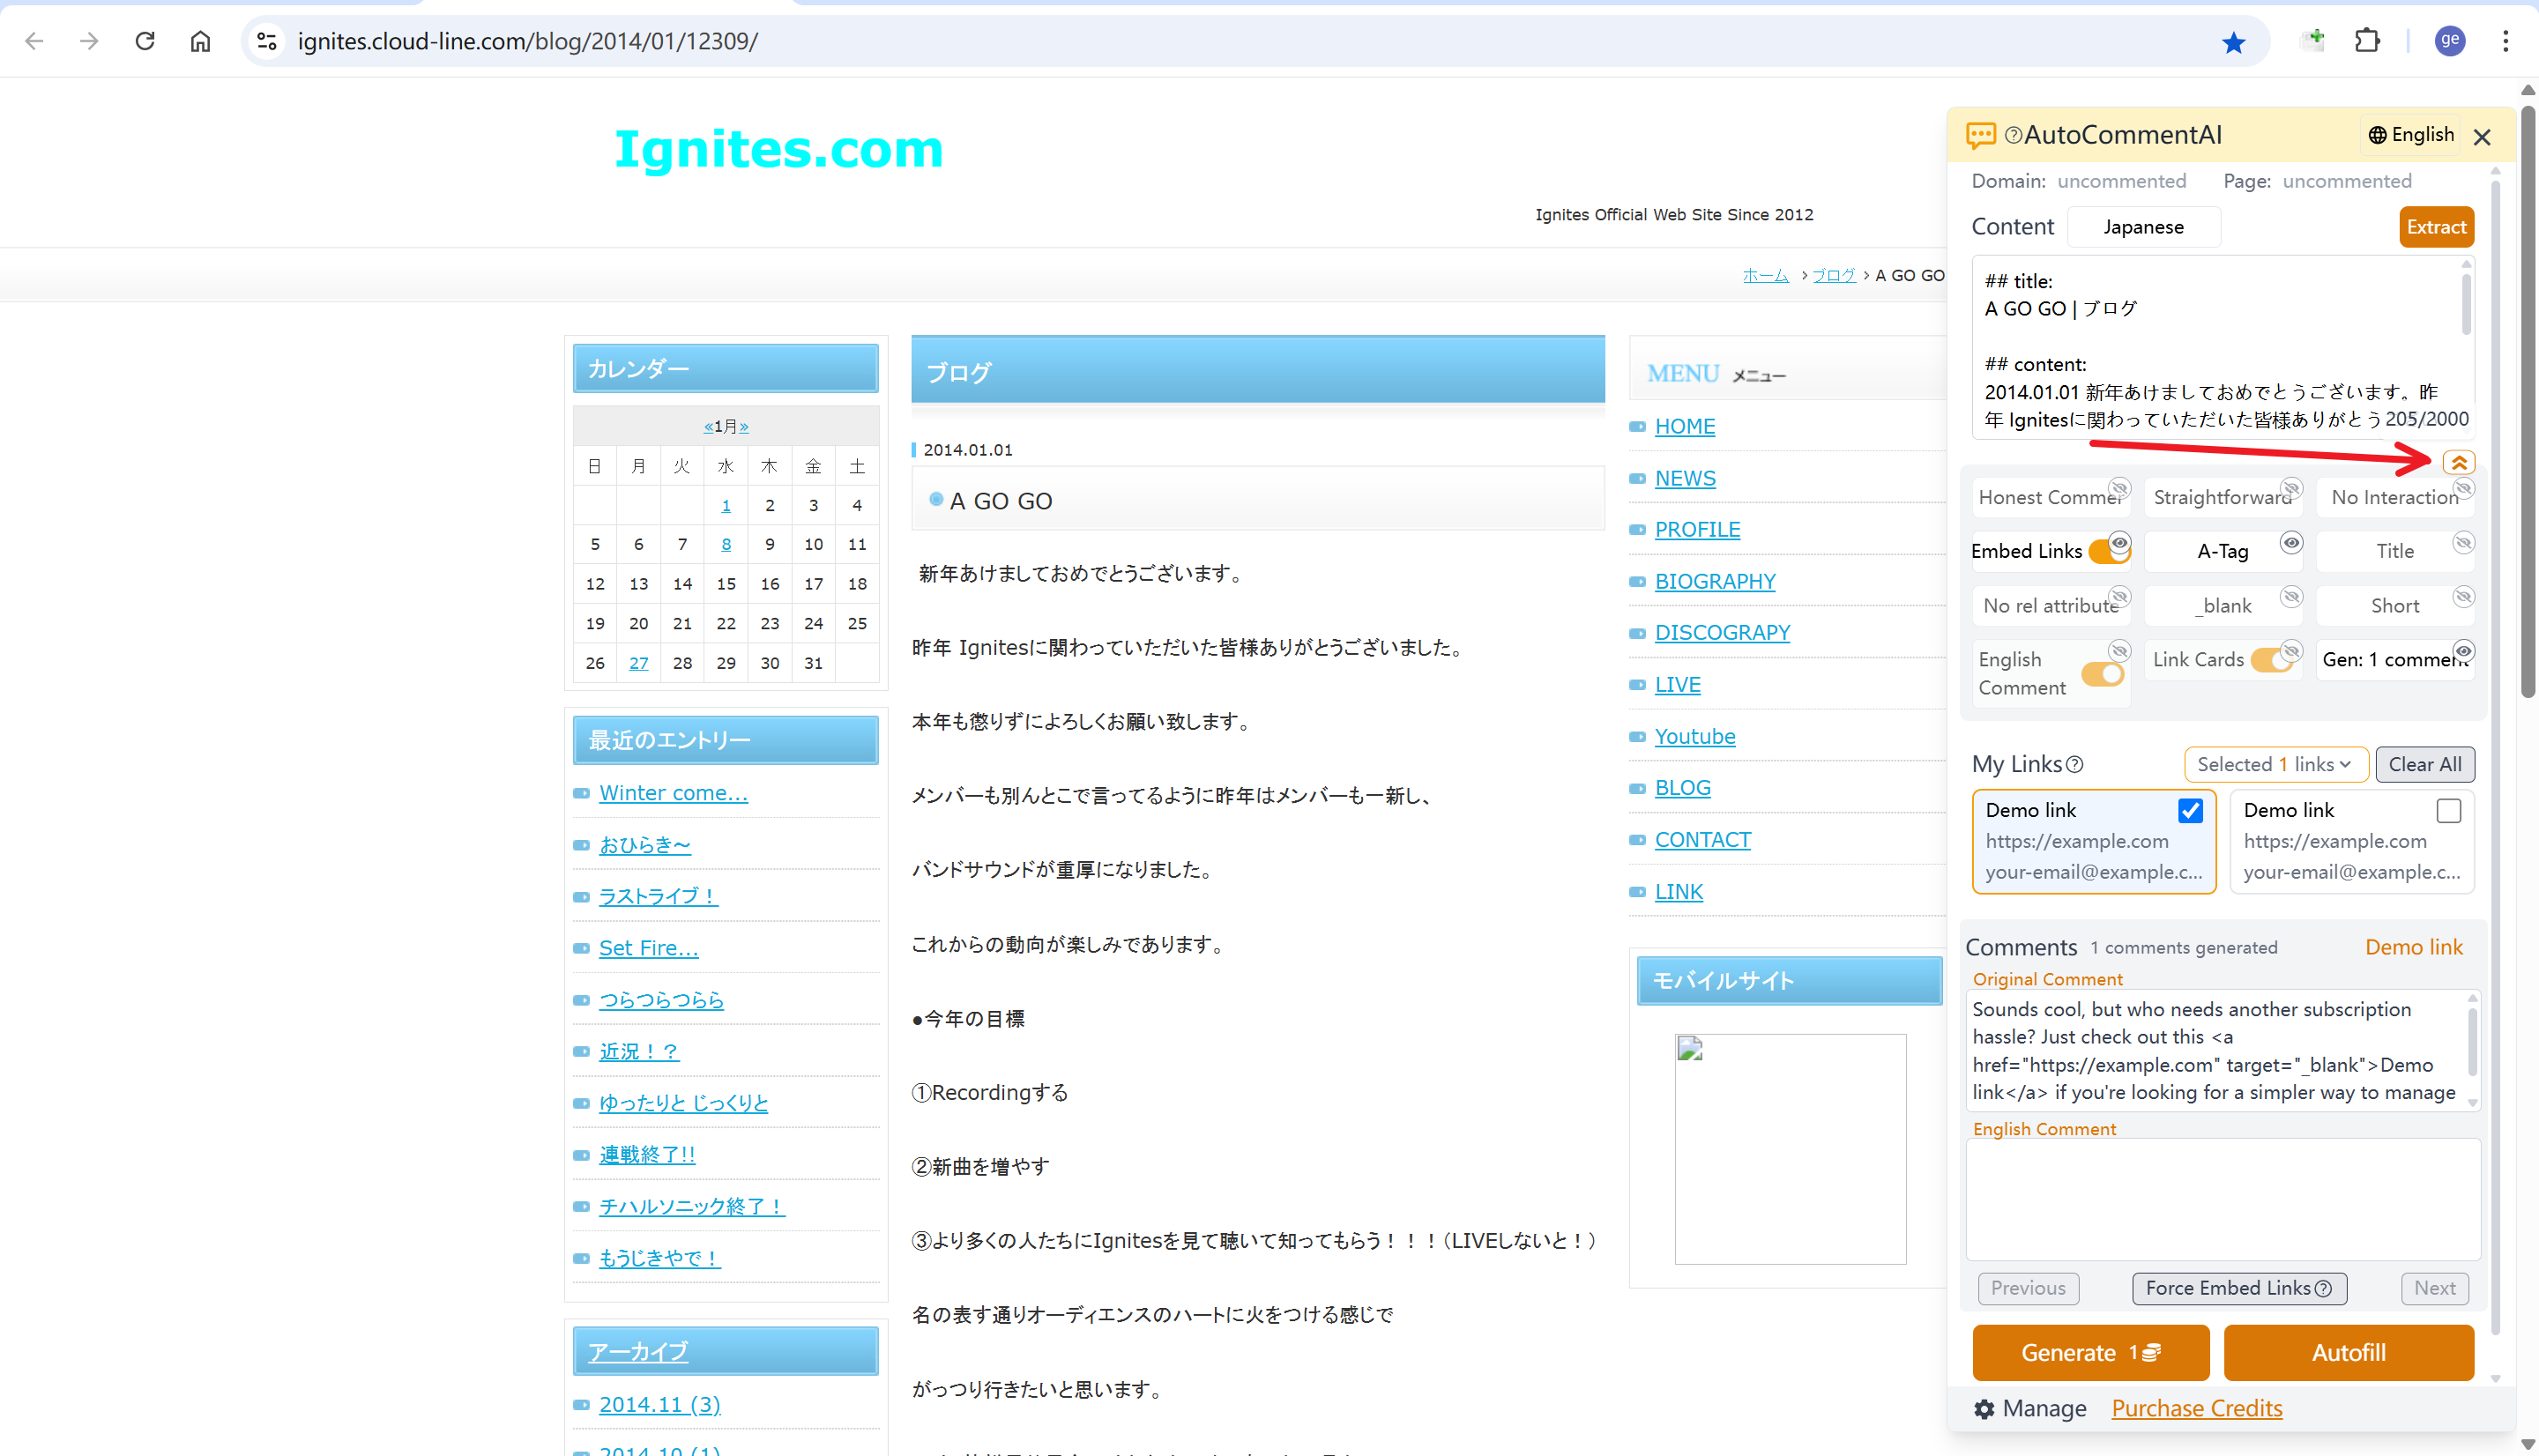
Navigate to any page where you want to submit a comment (blogs, forums, news articles, etc.). Click the side button to expand the panel. The extension will automatically extract the main content of the page into the text box and detect the page’s language for comment generation (you can also manually select a different language). If extraction fails, you can manually copy and paste the content into the text box.
5. Configuring Generation Options
The extension offers various settings: persona, comment style, interactivity, link embedding, link format, comment length, and the number of comments to generate at once.
-
Customize Setting Visibility Most settings are hidden by default. Click the yellow gear icon to show all options. Use the eye icon next to each option to toggle its visibility.
-
Persona: Defines the commenter’s role. Current options include: Curious Redditor, Sarcastic Techie, Warm Companion, Straightforward Critic, and Trendy Jokester. Each persona has a detailed prompt that guides the AI’s generation style.
-
Comment Style: Sets the tone of the comment. Options: Lighthearted & Humorous, Sincere & Emotional, Crisp & Direct, Artistic & Lyrical, and Personal Anecdote.
-
Interactivity: Determines if and how the comment encourages interaction. Options: No Interaction, Guiding Question, Shared Resonance, Humorous Follow-up, and Friendly Debate.
-
Comment Length: Sets the length of the comments. Options: Short (1-2 sentences), Medium (3-5 sentences), and Long (6-8 sentences).
-
Generate Chinese Comment: When enabled, a Chinese version of the comment will also be generated. Default is on.
-
Show Link Cards: When disabled, the link cards in the “My Links” section will be hidden. Default is on.
We welcome feedback and suggestions if you have custom needs for these settings.
6. Setting Up Embedded Links
This feature naturally weaves your website information and a hyperlink into the generated comment.
-
Enable Link Embedding: Toggle the “Embed Link” switch in the side panel.
-
Set Link Format: Choose from four formats:
<a> tag,Markdown,BBCode, orraw URL, covering almost all use cases. -
Set Anchor Text (Optional):
- Title: Uses the link’s title as anchor text.
- Manual Select: Manually choose an anchor text from the link’s predefined list via a dropdown on the link card.
- Random: Randomly selects an anchor text from the list.
- AI Generated: Lets the AI generate context-aware anchor text based on the page content and link description.
-
<a>Tag Attributes (Optional): If using the<a>tag format, you can setrelandtargetattributes, as some blogs have specific requirements. Therelattribute supports multiple select.
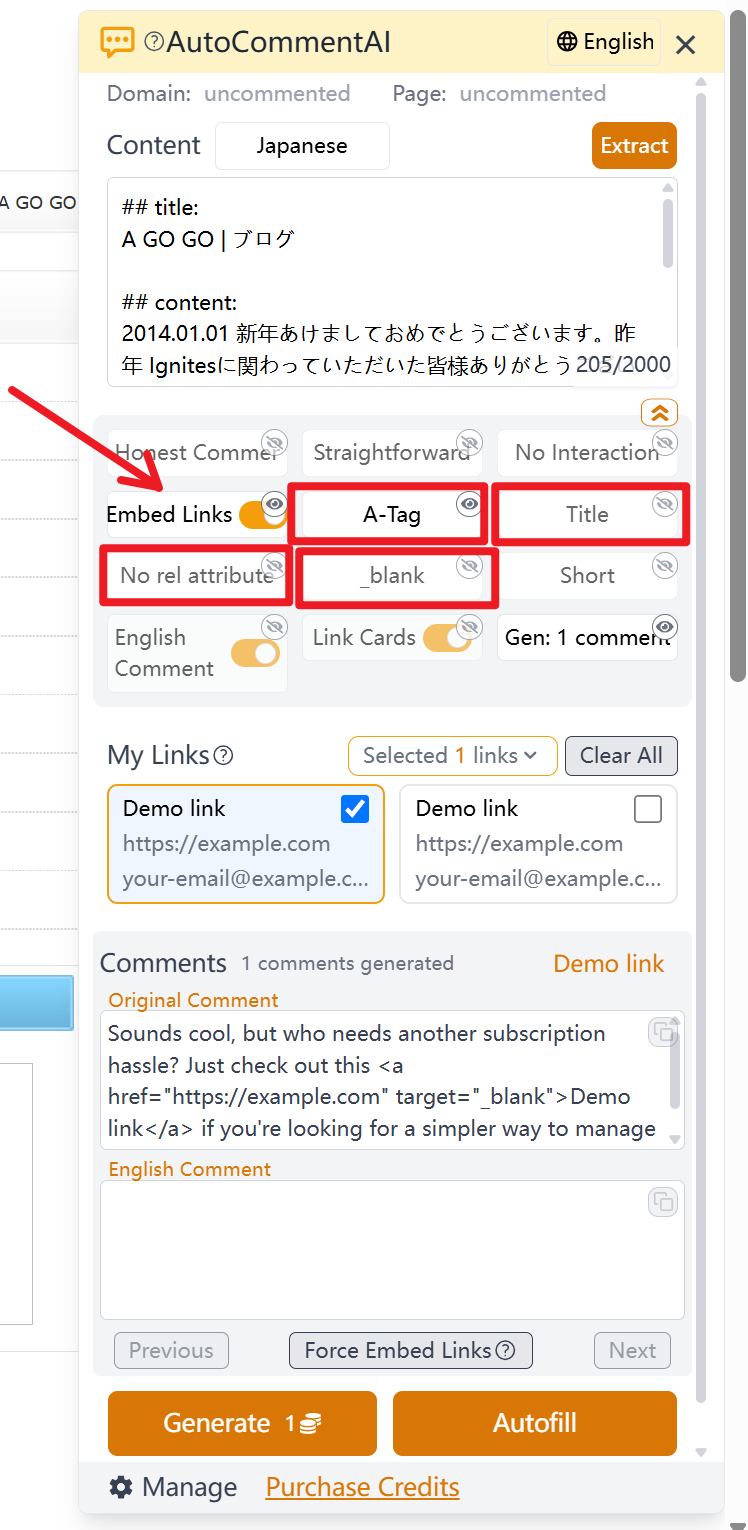
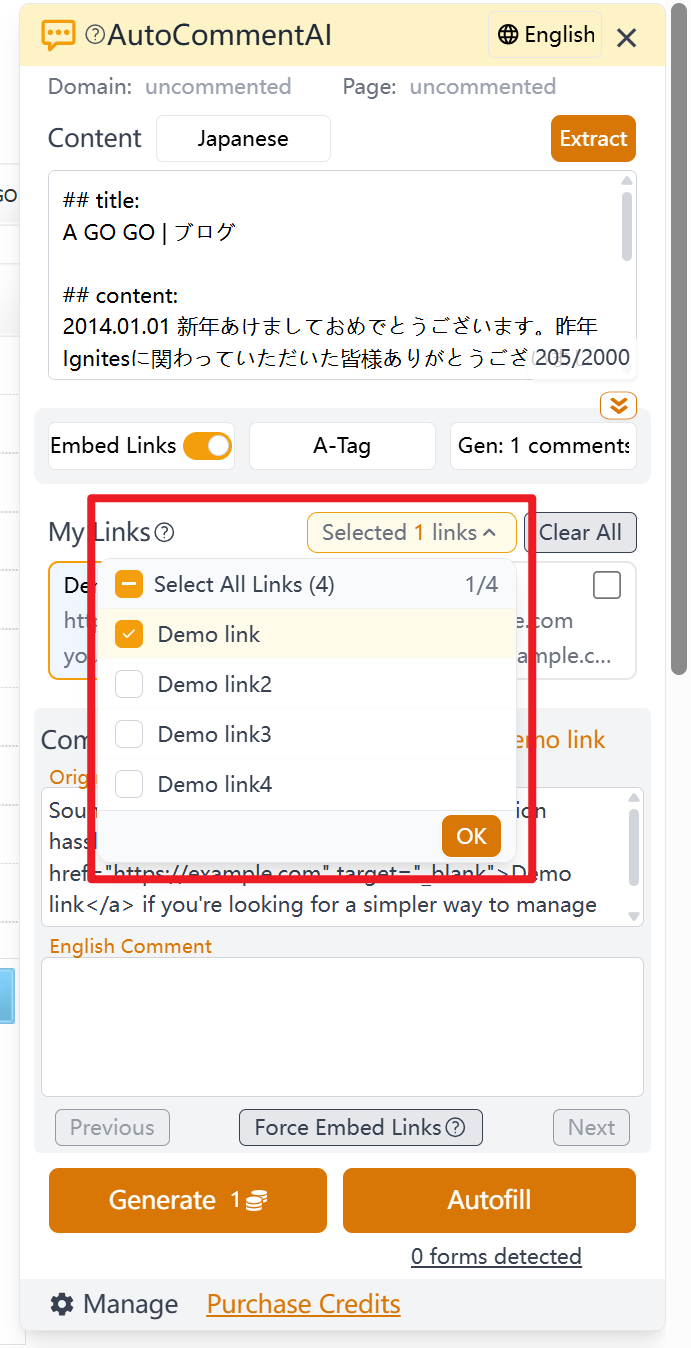
7. Selecting Links to Embed (Optional)
If link embedding is enabled, you must select which links to insert. The number of selected links should match the number of comments you’re generating. For example, if you generate 3 comments, select 3 links, and each comment will be embedded with one of them respectively.
-
“My Links” Section Explained You can select links using either horizontally scrolling cards or a dropdown list.
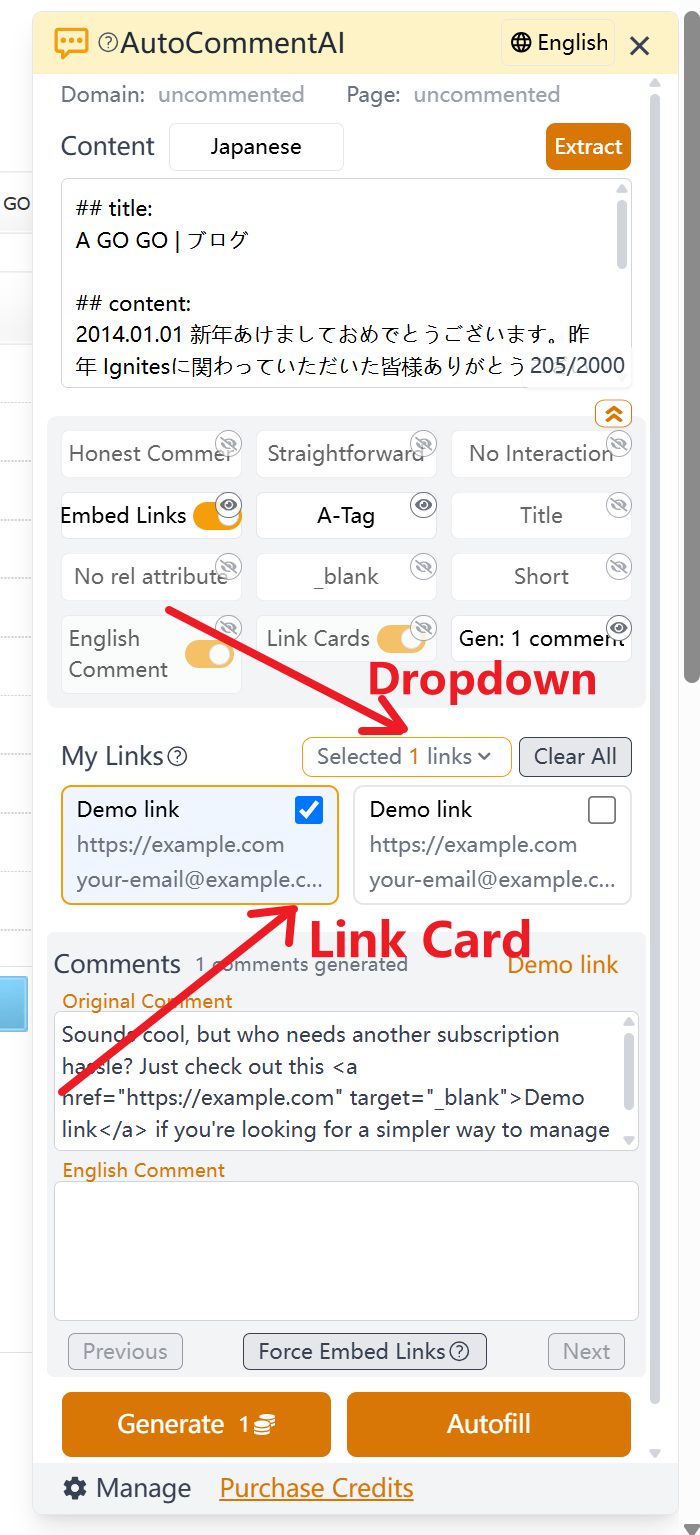
- Link Cards: Each link is displayed as a card showing its title, URL, and email.
- Card Scrolling: Scroll through your links using the side arrows or your mouse wheel. The centrally positioned card (highlighted) is the one that will be used for autofilling the form.
- Selecting a Link: Click a card to select it for embedding. Links are bound to comments in the order they are selected.
- Dropdown Selection: Use the dropdown menu as an alternative to scrolling cards.
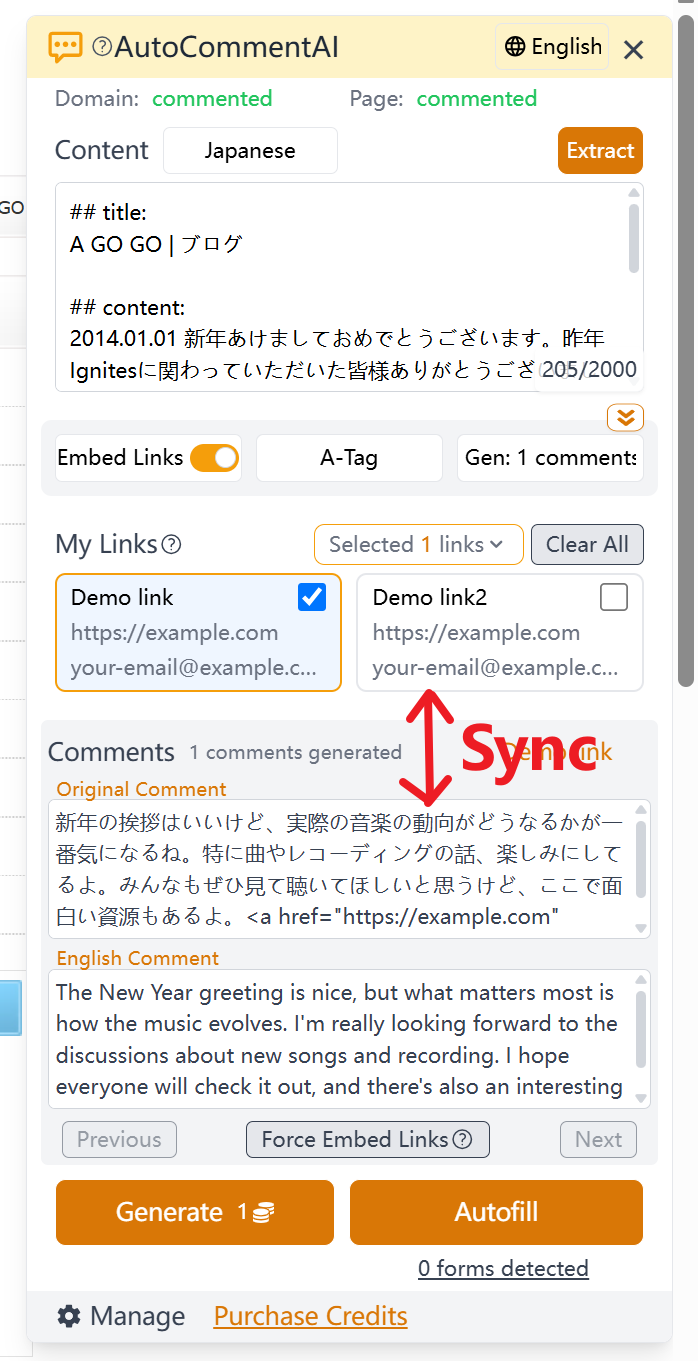
-
Comment and Link Syncing When you scroll through the link cards, the card in the center gets a golden border. This central card is synced with the comment display. Scrolling to the next link will also scroll to its corresponding comment, and vice versa.
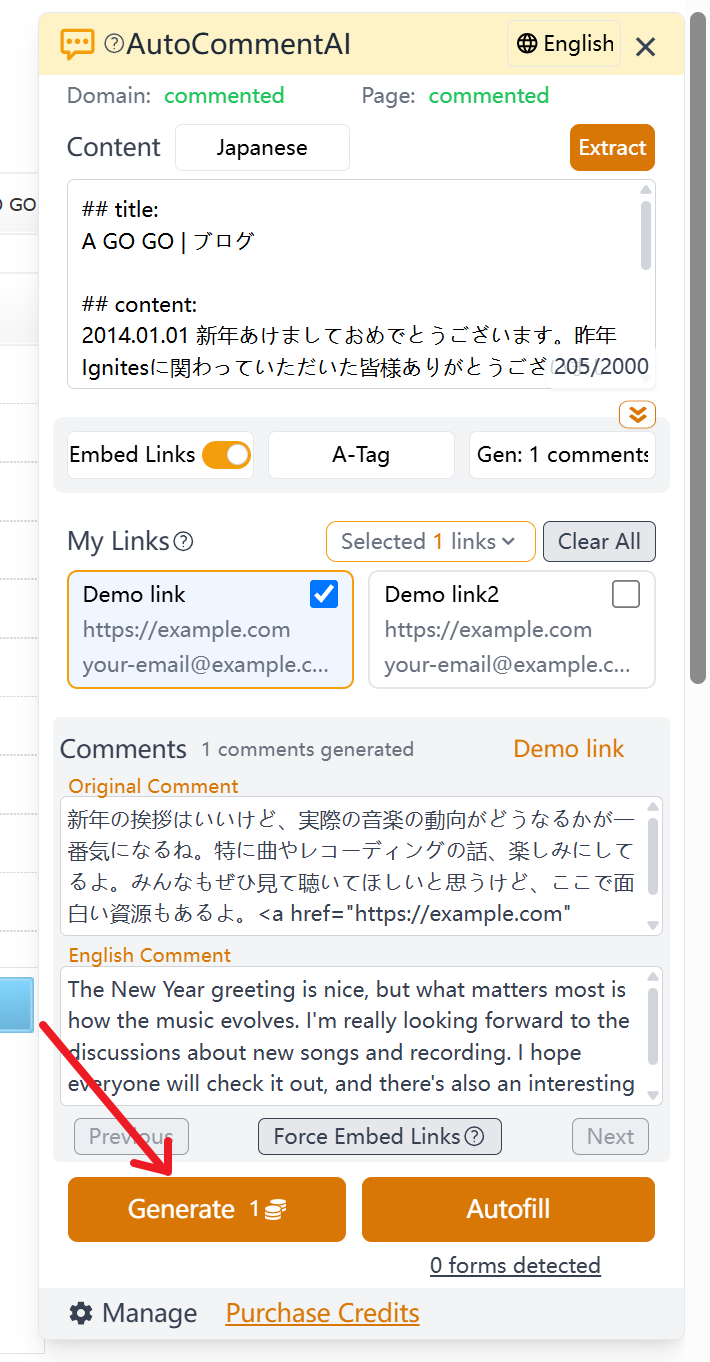
8. Generating Comments
Click the “Generate Comments” button at the bottom. Generating a single comment takes a few seconds; multiple comments may take up to 10 seconds. The credit cost is displayed on the button before you click.
9. Autofilling the Comment Form
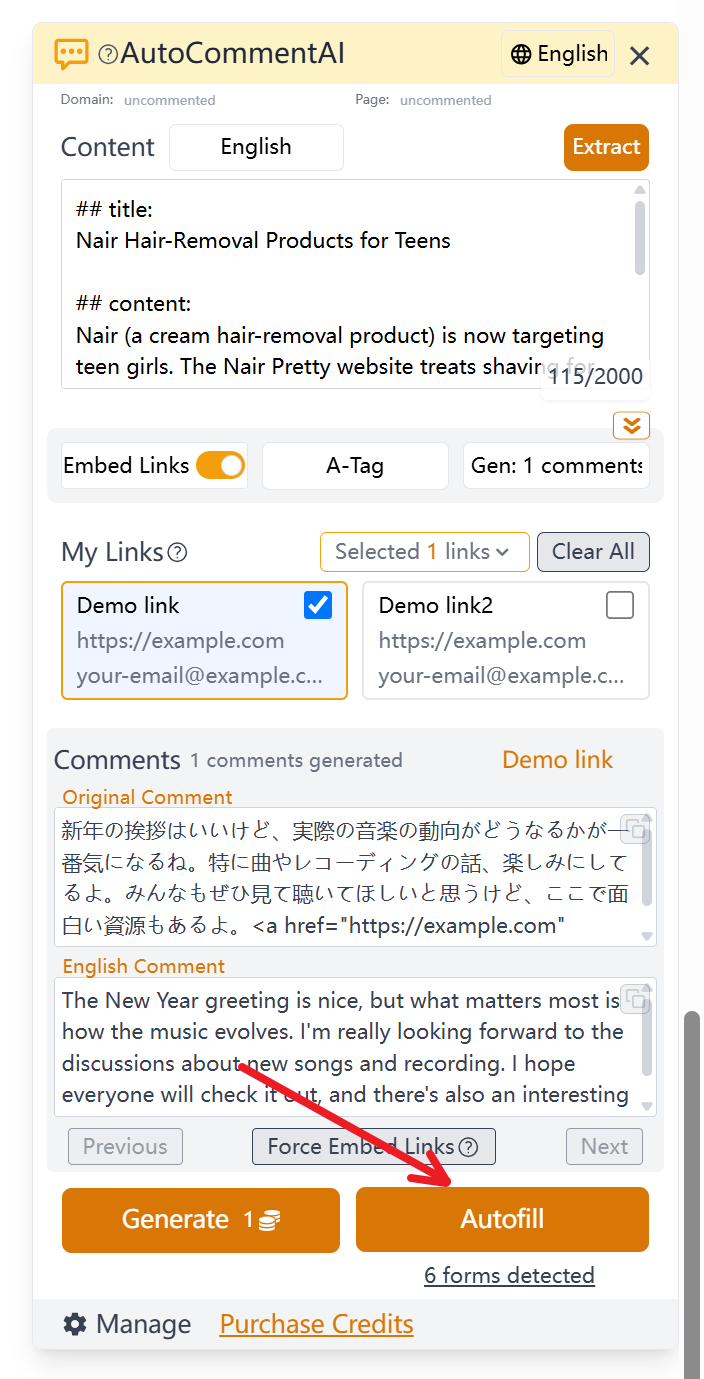
-
Automatic Form Detection The extension automatically detects comment forms on the page and indicates them below the “Autofill” button. Clicking the “Detected N forms” text will highlight the detected forms on the page with a blue pulsing border and a label, and scroll the page to their location.
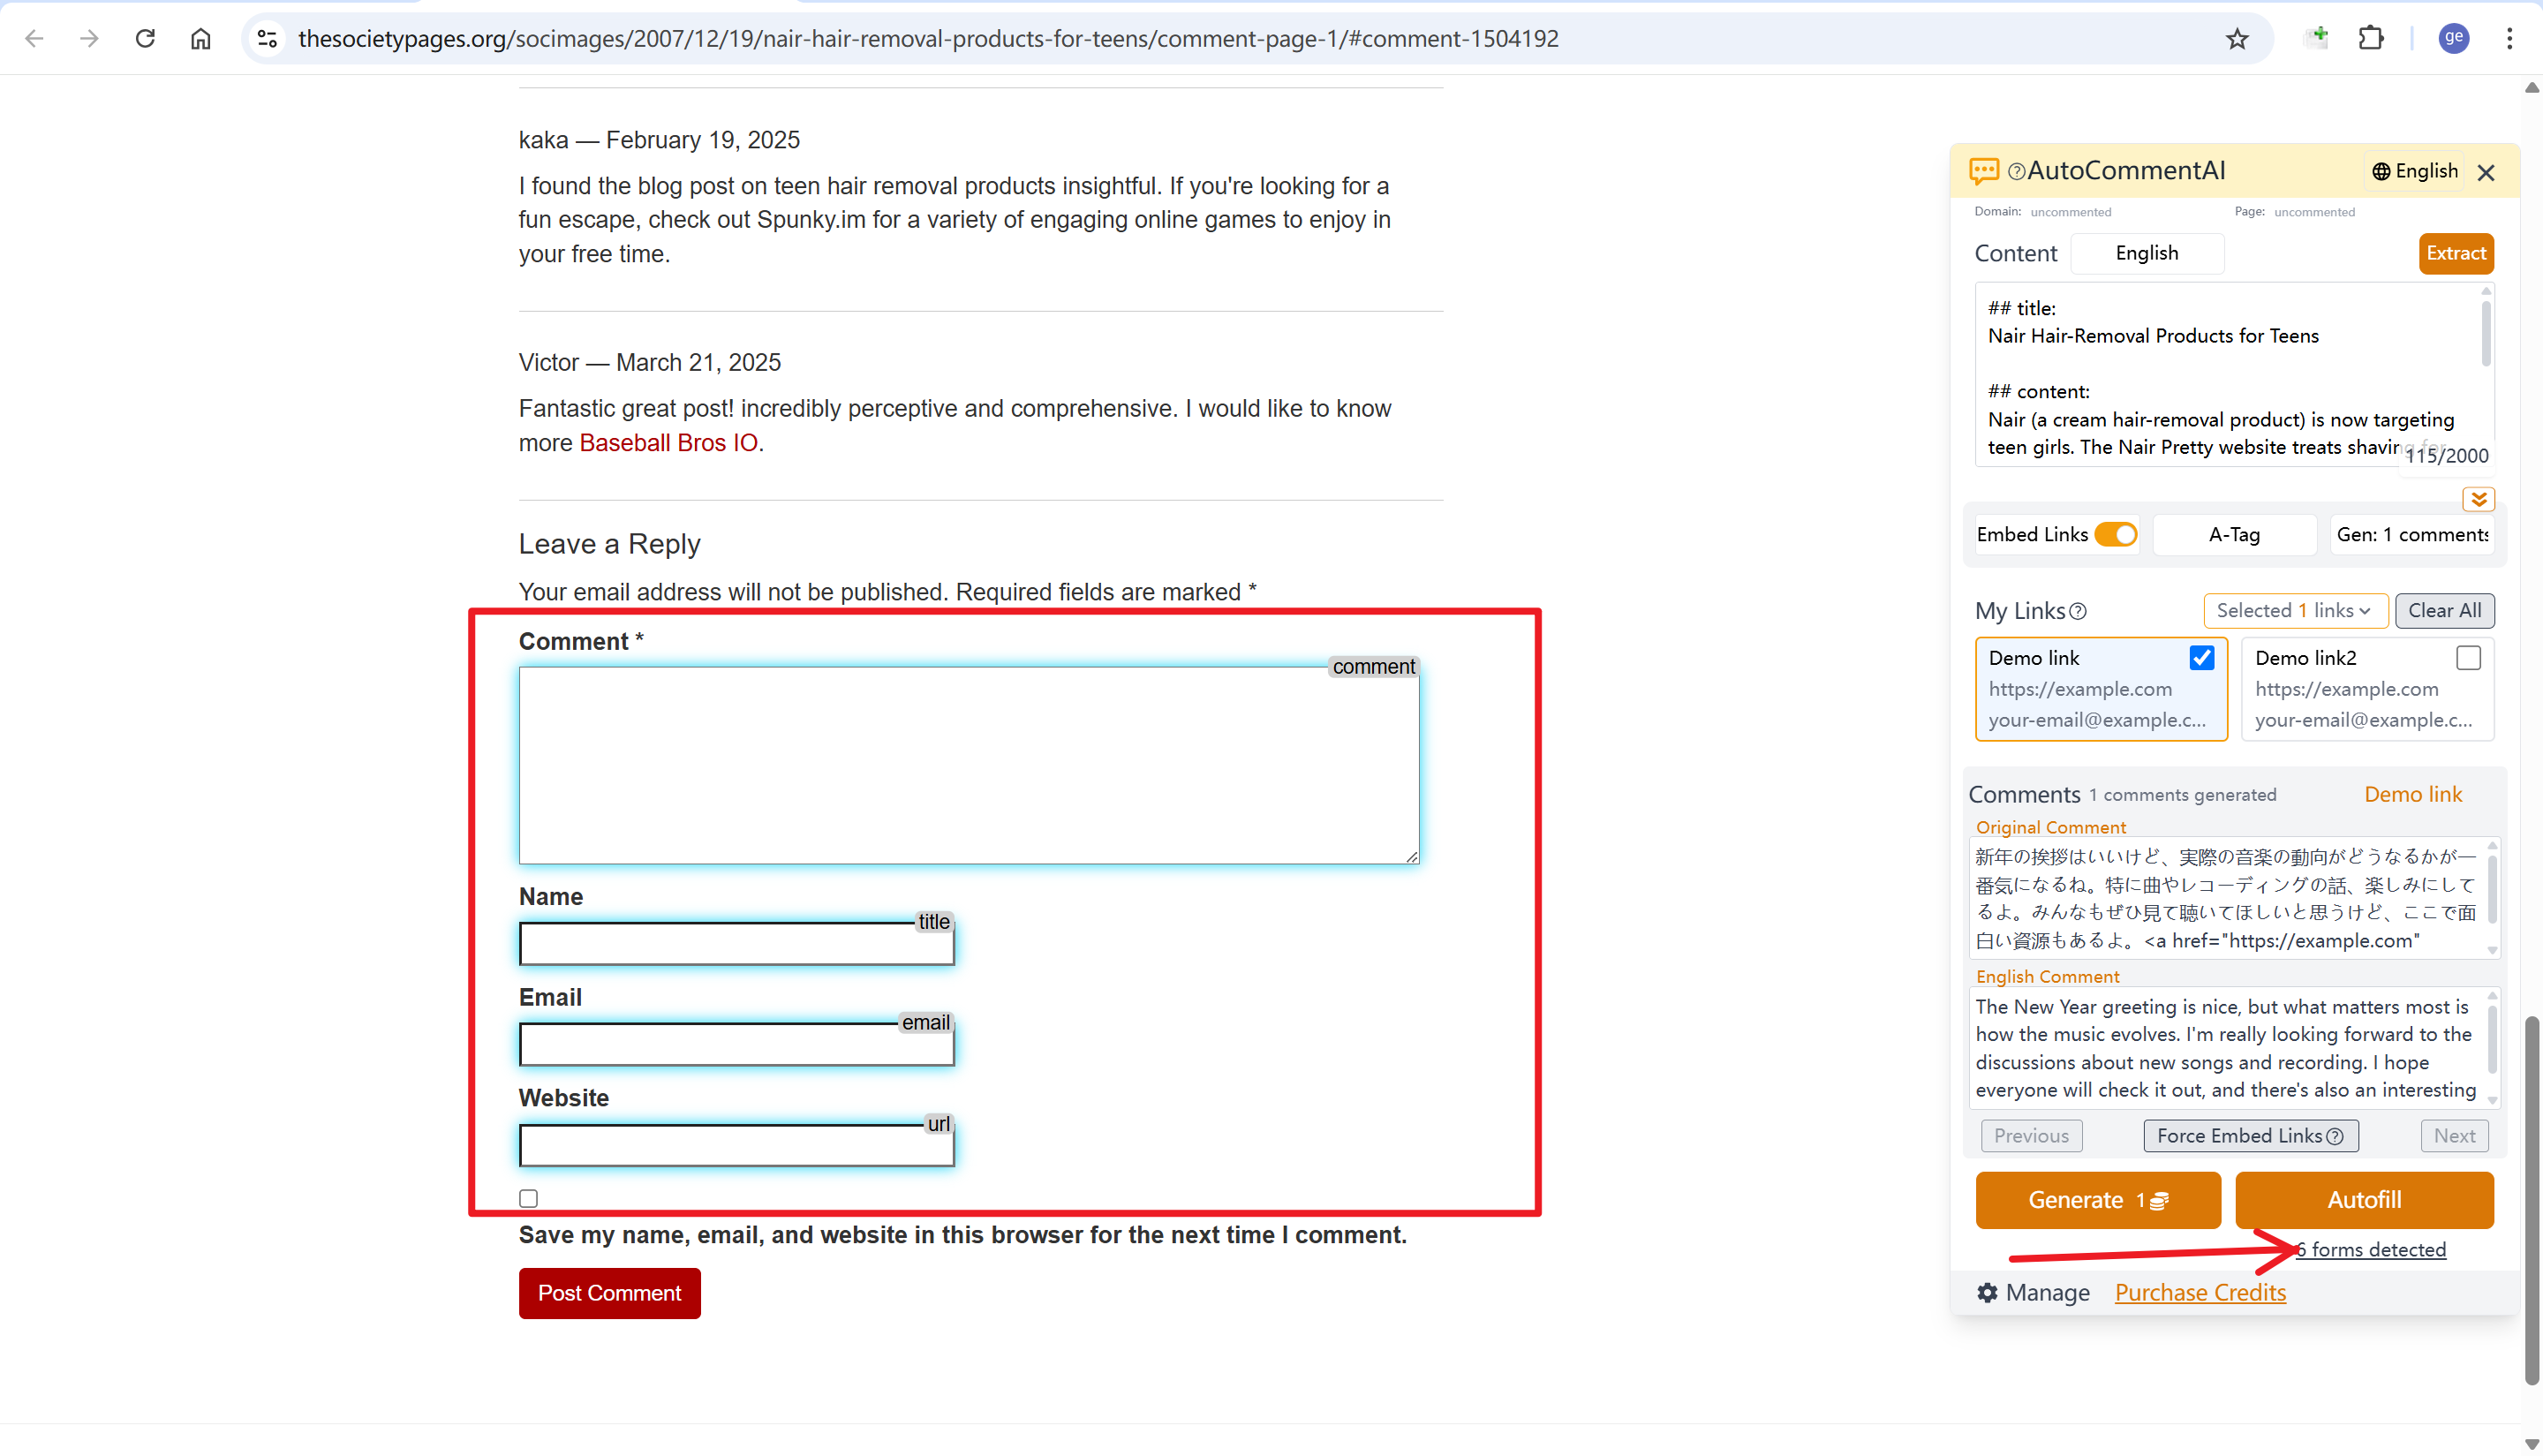
Note: Form detection is not 100% perfect. If a field isn’t detected correctly, you can manually copy and paste the content. Hover over link cards or comments to find copy buttons.
-
Autofill After generating comments, click the “Autofill” button. This will populate the detected form fields with the content from the current comment and the information (name, URL, email) from the central (golden-bordered) link card.
-
Comment and Link Syncing for Autofill If you generated comments with the “Embed Link” option enabled, each comment is tied to a specific link. Scrolling through your comments will automatically bring the corresponding link card to the central position, and vice-versa. This simplifies the process of promoting multiple sites, as you only need to scroll and click “Autofill” for each comment/link pair.
-
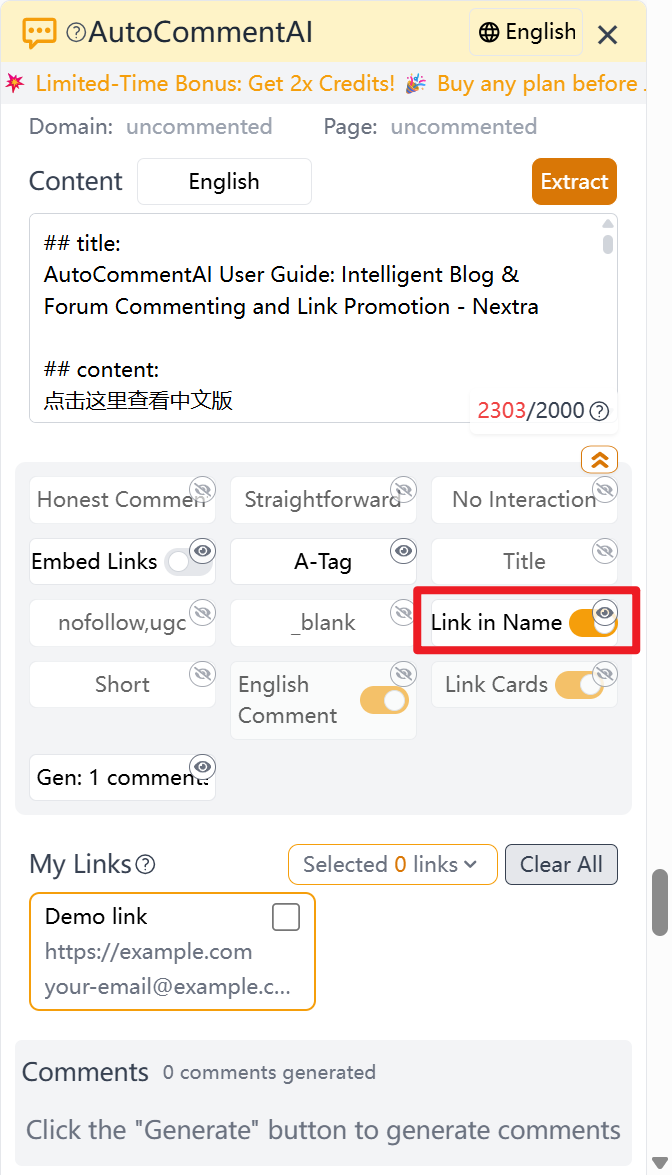
Leave Link in Name (Title) Field Some websites do not allow links in comments, but do allow inserting links into the Name (or sometimes called Title) field. For such cases, a special option “Link in Name” is provided. When this option is enabled, the auto-fill function will insert an
<a>link into the Name field. The inserted<a>link will be dynamically generated based on the settings of Link Anchor Text, rel attribute, and target attribute.
10. Additional Notes
-
Local Link Storage: Your link data is stored in your browser’s local storage for privacy reasons. Be cautious when clearing your browser cache, as this will permanently delete all your link data.
-
Local Configuration Storage: Your settings are also stored locally and will be lost if you clear your browser cache.
-
Plugin Updates: Chrome extension auto-updates can be delayed. It’s recommended to update manually. 📌 Manual Update Steps:
👉 Click the extensions icon in the top-right of your browser. 👉 Click “Manage Extensions.” 👉 Enable “Developer mode” in the top-right. 👉 Click the “Update” button on the left.
Typical Usage Patterns
- Promoting a Single Website (Single Comment Generation) This is the simplest mode. Generate one comment at a time, with or without an embedded link. This is the basic use case for AutoCommentAI.
- Promoting Multiple Websites (Batch Comment Generation) In this mode, you’ll switch between multiple links and comments. AutoCommentAI’s syncing mechanism streamlines this process, saving time and increasing efficiency even when promoting several sites at once.
Pricing
1. Credit Plans
- $5 for 250 credits
- $10 for 550 credits
- $30 for 1800 credits
- Enterprise plan, please contact us for pricing.
2. Credit Consumption Algorithm
The credit cost is shown on the generation button. The calculation is as follows:
- Base cost: 1 credit per generation.
- +1 credit for generating 2-3 comments at once; +2 credits for 4-5 comments.
- +1 credit if the max context length is set to 5000 and the actual content length exceeds 2000 characters.
3. How to Purchase Credits
Ensure your extension is updated to the latest version.
🎁 Purchase Credits:
👉 Go to the extension’s management dashboard. 👉 Click the “Buy Credits” button in the bottom-left. 👉 Select a plan and click “Buy Now.” 👉 Follow the prompts to complete payment. 👉 Credits are typically added to your account within one minute.
New User Bonus: New users receive 30 free credits upon registration to try out the extension.
Support / Feedback
For any issues, please contact us via these channels:
- Email: drewgrant616@gmail.com
- X(Twitter): https://x.com/auto_comment_ai